Showing posts with label treat. Show all posts

Wednesday, March 19, 2014

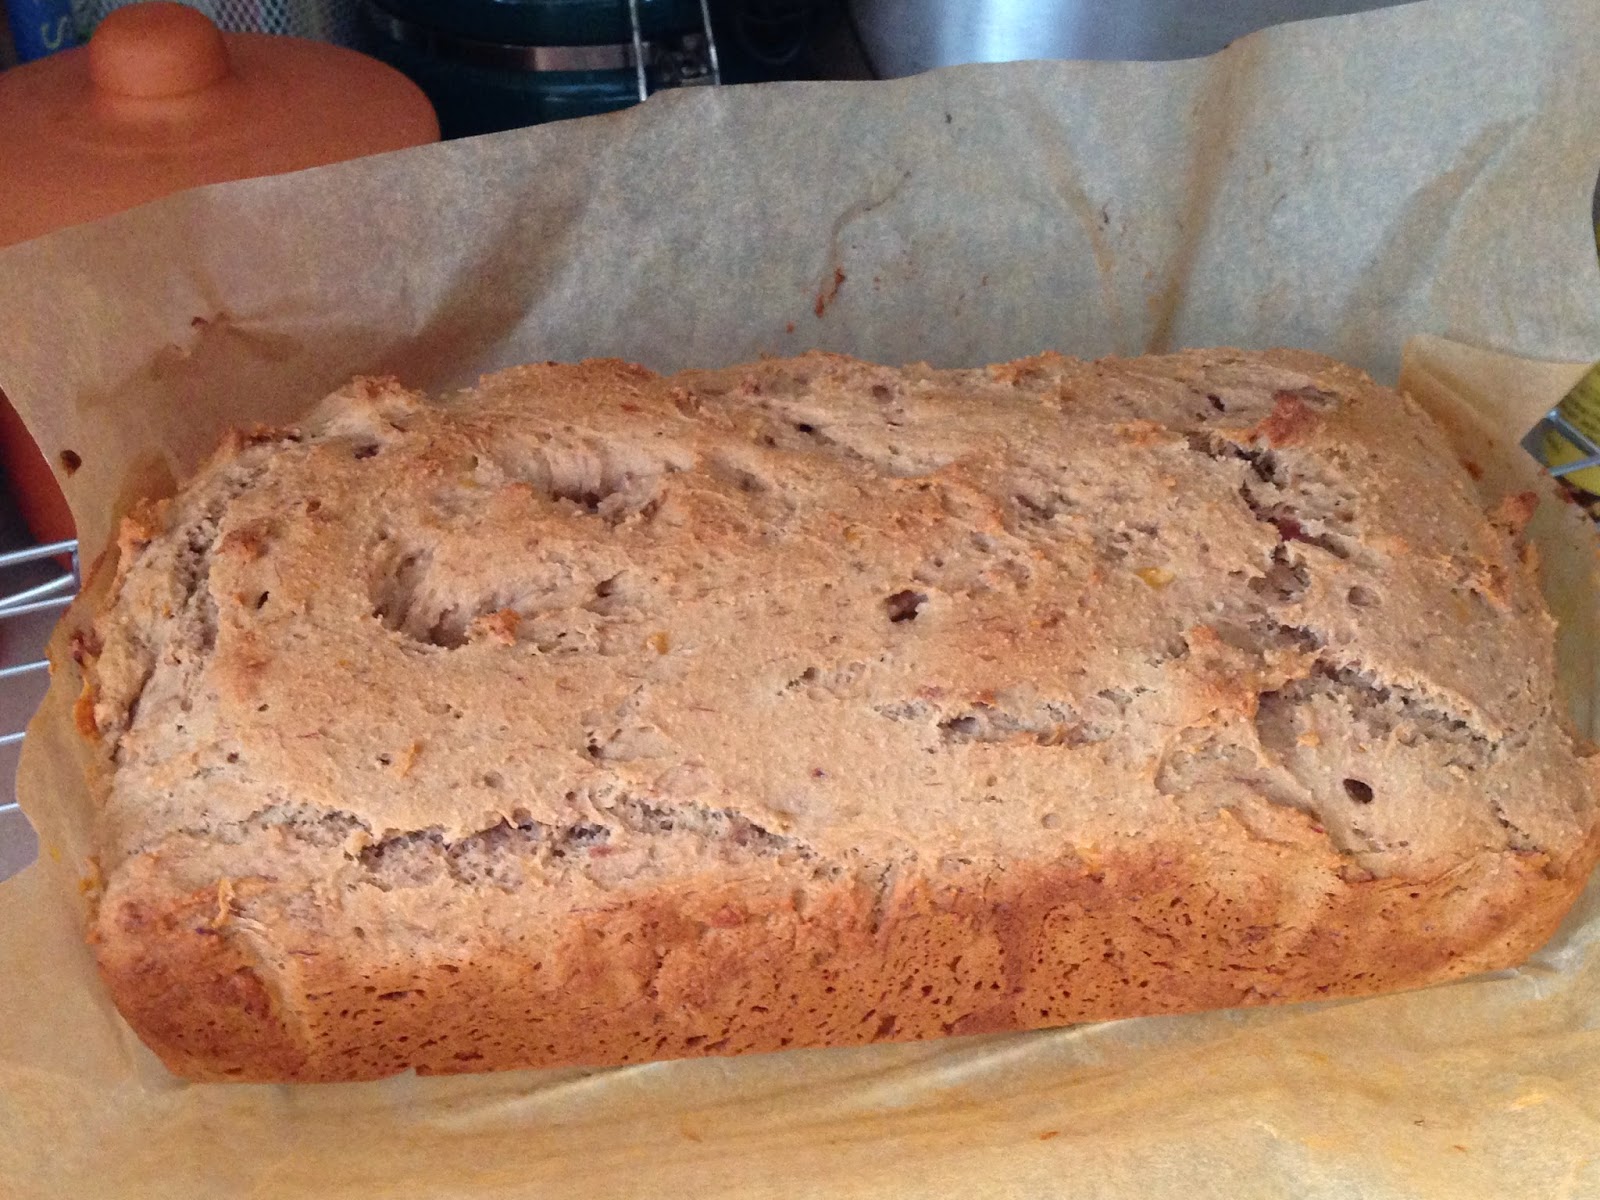
PB&J Banana Bread

I'll be honest: there was a moment, as I slid the loaf pan into the oven, when I thought: This is going to be heavy and dry. And possibly inedible. I should really have tried the original recipe first, or at least gone with a more familiar substitution like apple sauce.

I was very relieved to discover how wrong I was!

Welcome back to Lent, when my baking experiments get a little weird. Once I again, I set aside consumption of various things I normally love, including sugar and (at least most of the time) butter, cheese and eggs.

I was trying to explain the reasoning behind this to a friend a few weeks ago, and it didn't go very well—partly because my friend was feeling silly while I was trying to answer seriously, and partly because my usual words were not quite resonating for me. And then, on the first Sunday in Lent, I heard another friend, Rev. Meaghan Kelly of New Church, preach on the subject of giving up coffee—not for Lent, just in general. To paraphrase, she said something like, I realized I needed a cup of coffee to feel like the world is a good place. And if I'm depending on a beverage to feel like the world is a good place, I probably need to stop drinking coffee for awhile. [She may not have said "for awhile." My brain can't fathom the alternative, though, so I'm going to pretend she did.]

And I guess that's what I do when I set aside (I prefer that phrase, rather than "give up") consuming coffee, tea, alcohol, sugar, television, fiction literature ... all things I enjoy and consider to be evidence that the world is a good place. I need to stop escaping and start reconnecting with friends, family and God.

Which probably makes recipes like this one a little beside the point. Because I definitely would have a harder time considering the world a good place if I couldn't have peanut butter. But, six and a half weeks is just a really long time to go without the occasional sensory pleasure. And the flavor and belly-filling heartiness of peanut butter come through really nicely in this modified recipe based on Rebecca Reilly's Peanut Butter Banana Bread.

A couple of notes: I buy my natural peanut butter (peanuts and salt, only) and fruit-sweetened fruit spread (which I call "jelly") at Trader Joe's, but you can find them in a lot of stores. This bread is not at all sweet, but does have nice, subtle flavors that hint mostly at peanuts and banana. I used strawberry fruit spread, but couldn't really taste it in the bread, so any flavor should be fine.

I was really pleased with how fluffy and nicely-browned this turned out!
The concentrated fruit-sugar in the jelly must have been enough to get some nice browning going.

PB&J Banana Bread


1 c. brown rice flour
2/3 c. potato starch
1/3 c. sweet rice flour
1 tsp. baking powder
3/4 tsp. baking soda
1/2 tsp. xanthan gum
1/4 tsp. coarse sea salt
1/2 c. natural peanut butter
1/2 c. fruit-sweetened fruit spread
2 ripe bananas, peeled

Preheat over to 350°F. Line a 9"x5" loaf pan with parchment paper.

Combine all dry ingredients (brown rice flour through salt) in a bowl. Stir gently with a whisk to homogenize a little.

Place peanut butter, fruit spread and peeled bananas in the bowl of a mixer. Mix on low, then speed up to medium for a couple of minutes, until bananas have incorporated completely and mixture is starting to lighten. Turn off mixer.

Add dry ingredients, then turn mixer on low speed and mix until just completely incorporated.

Use a rubber spatula to spread the batter into the pan. It will be very stiff and seem a little sticky and dry. This is okay, as it turns out!

Bake 40 minutes, until a toothpick inserted in the center comes out clean. Use the parchment paper to lift the loaf out of the pan, and cool on a wire rack at least 10 minutes before slicing.

Makes about 10 generous slices.

Delicious with a glass of milk, or some herbal tea! [Herbal tea is not made from tea leaves, so I do drink it during Lent. Trader Joe's Ruby Red Chai with milk was a perfect accompaniment, this morning.]

Sunday, May 6, 2012

Bourbon-Infused Popcorn

Okay, attempt number one at bourbon-infused popcorn.

I heard a bit on NPR a few weeks ago about a gourmet food show which included "artisanal" popcorn offerings. (And seriously? Can we just ban the word "artisanal" already?) But back to the topic at hand, in the course of the story, I heard a magical three words: Bourbon. Infused. Popcorn.

Not one to spend $12 on a few ounces of popcorn, I decided to try to make my own at home. The results were not as bourbon-ish as I was hoping, but definitely tasty.


I started with about 1/2 c. unpopped kernels and put them in a tiny jar with the last of a nip of Knob Creek, which was left over from an egg nog ice cream attempt back around Christmas. I probably had about 2 Tbs of bourbon, total, which wasn't enough to submerge all of the kernels. So, I turned the jar over periodically to distribute the bourbon as well as I could, while there was still excess liquid.

This probably sat around my kitchen for a couple of weeks. Another time, I would use a shallower dish, more bourbon, and also probably spread out the kernels to dry a bit after soaking for a shorter time, like overnight or so.

Anyway, I popped the popcorn as usual, with a generous drizzle of canola oil and about 1 tsp salt, in my Whirlypop, until the popping noises stopped. Meanwhile, I melted 1 Tbs unsalted butter in a small dish, about 30 seconds in the microwave.

Then, I transferred the popped popcorn to a muslin bag, drizzled in the butter, and sprinkled it with an additional pinch of salt (which I think was too much, I'll leave that out next time) and about 1 Tbs cinnamon-sugar, which is 2 parts sugar to 1 part ground cinnamon, and keeps indefinitely in a jar in the cupboard.

Like I said: not as bourbon-ish as I'd envisioned, but perfectly tasty popcorn. And I did get an occasional kernel that had a strong bourbon flavor.

Hmm, a work in progress ...

Sunday, April 22, 2012

Time to make the donuts ...

No, seriously, I made donuts!

Lent is over, Alleluia!, and I've been trying to find a sane balance between eating the kinds of healthy things that made me feel good during Lent and eating the kinds of sugary things I often enjoy. My solution has been to save at least four days a week as days when I don't eat any sugar at all, but allow myself a few days when I have some sweets. I'm finding that I don't crave sweets as much, and if I start to, I may have to cut sugar back to fewer days. It's probably just my personality, but I need some sort of absolute prohibition (even if it's only a day or two at a time) to keep myself from taking a flying leap off the wagon.

Meanwhile, I found some interesting recipes during Lent, and have been looking for opportunities to try them. One of those was Gluten-Free Maple Glazed Banana Donuts from Udi's Gluten Free Foods. I even bought myself a donut pan and everything! I used rice milk instead of almond milk, because it's what I had, but otherwise I tried to stay true to the recipe for this first attempt.

It went pretty well. I think the recipe is actually supposed to make 9-12 donuts (I couldn't find that info anywhere in the recipe, please tell me if you see it!), and I slightly over-filled the donut trenches before figuring that out. (I had some leftover batter, even so, and baked that in the bottoms of four cupcake cups.) The size of the finished product is totally reasonable, but I ended up baking them 14 minutes and I think they really needed longer.

Right after coming out of the oven
Also, I tried to get cute and dip the less-pretty side in the glaze, in hopes that the glaze would cover that and make the whole thing look pretty, but the glaze only soaked in. Possible that I should have waited longer before glazing, or that I should have just dipped the less-porous top side. [I should include a shout-out here to the Carlisle (MA) Tap-and-Sap Society. I bought a pint from their 2009 run at last year's Old Home Day, and have been rationing it carefully until I can get some more. But, I thought my first donut attempt was a worthy enough cause to use a few Tbs.]

Still, they do look like donuts!
The texture is basically like a soft sponge cake, light but too delicate to dunk into coffee or anything like that. They would probably be a little more solid with a few more minutes in the oven. They're also all kinds of sweet, which was barely mitigated by the cup of strong, black coffee I had alongside, but the banana and maple flavors were very tasty.

All in all, I would try this recipe again. I think I would either look for a way to make the glaze with less sugar or try to work the maple flavor into the donuts and skip the glaze altogether. One obvious idea would be to replace some or all of the sugar with maple syrup, and add some flour to balance; the liquid:ratio balance could also be maintained, potentially, by omitting the milk. (It was a coincidence that I had rice milk on-hand, incidentally. In the future I'm sure dairy milk would work fine for those, like myself, with no dairy issues.)

Final verdict: These were easy to make and the price of ingredients, which are things an average gluten free baker would have around, anyway, was way lower than a box of Kinnikinnick or Glutino donuts in my local supermarkets. Definitely worthwhile!

And now, I definitely have to get back out and run today ...

Saturday, March 24, 2012

Jam-Filled Thumbprint Cookies

As I continue in my Lenten discipline of eating no sugar and keeping mostly vegan, I've been getting more and more interested in playing around with old favorite recipes that normally contain lots of butter, sugar, eggs, or whatever, and making them tasty without all of those things.

My secret to success, in general, has been fruit, which can add sweetness and moisture. I also recently read that nut and coconut flours can make for very moist, rich-tasting baked goods. Since I teach at a nut-free school (but coconut is apparently ok), and had had a bag of coconut flour in the back of my fridge forever, I decided to try using some. I've also read that sorghum flour can do a good job of binding itself without added gums (xanthan, guar, etc.) and had a bag of that lying around, so I decided to go with that. And finally, I always think of jam cookies as being especially tasty with a little powdered sugar sprinkled on top at the end, but I didn't want to go that route, so I decided to use some unsweetened, shredded coconut, instead.

The dough of these ended up a little pasty and not very sweet, but I think the preserves balance it nicely. If you like a little more sweetness, try adding a Tbs or so of agave nectar.

These were very touchy to form, so I might try a little xanthan gum next time, after all.


JAM-FILLED THUMBPRINT COOKIES
Makes 3 dozen cookies

1 c coconut flour
1 1/2 c sorghum flour
1 tsp gluten-free baking powder
1 tsp egg replacer
1/2 tsp salt
2 c unsweetened applesauce
1/2 c olive oil
1 tsp vanilla
1/2 c unsweetened shredded coconut
1/3 c all-fruit preserves

Combine flours, baking powder, egg replacer, and salt in a medium bowl and whisk to combine.

In a larger bowl, combine applesauce, oil and vanilla. Stir briskly to blend, then start adding dry ingredients bit by bit, stirring vigorously to combine. The resulting dough will be very crumbly, but should hold together when a small handful is gathered up and pressed into a soft ball. (Squeezing more firmly will cause it to fall apart again, but this is ok.)

If you're a slowpoke like me, you'll want to wait until after this next step to preheat the oven. If you work a little faster, you could preheat at this point or about halfway through the shaping process. Baking temperature will be 350°F.

Spread shredded coconut onto a medium-sized plate. Take up a small amount of dough and very gently press and roll it into a ball, about 1 inch in diameter (slightly smaller than a ping pong ball). Once it's holding together, place it in the coconut and roll it around a little, then, right there in the plate, shape it into a "thumbprint" shape. This means pressing your thumb down somewhat firmly in the middle while supporting the outside edges with your fingers, pressing things together again as they start to crack. There should be enough of an indentation to hold about 1/4 to 1/2 tsp of fruit preserves.

Transfer to an ungreased baking sheet and repeat until dough is all used up, moving to a second baking sheet when necessary.

Preheat the oven now, if you didn't do it earlier.

Measure out the jelly into a cup, and mash it with the back of the spoon to soften it if necessary. (Some brands of all-fruit preserves are a little excessive in the pectin department, or contain extra starch to stabilize. It's easier to measure little spoons of the preserves if you break this down a little.) Use a spoon to place a little in the dimple of each cookie, taking care to make as little contact with the cookies as possible, as they're very fragile.

Bake 20 minutes, or until golden brown. Cool thoroughly on the sheets, set on wire racks, then remove very carefully to a plate or tin. Enjoy one or two with a cup of tea for an afternoon or mid-morning treat!

Sunday, March 18, 2012

Pistachio-Stuffed Figs

When you give up sugar for Lent (or for a cleanse, for health in general, whatever), dried fruits start to taste reeeealllyyyy good.

PISTACHIO-STUFFED FIGS
(or Almond-Stuffed Dates, etc.)

3 large, dried figs (such as Smyrna)
15 g shelled pistachios

Use a small, sharp knife to remove the stem of each fig. Carefully stuff 1/3 of the pistachios into the stem-hole of each fig, then pinch closed.

A variation is almond-stuffed dates:

2 dried dated (such as medjool)
4-6 whole raw almonds

Use a small, sharp knife to make a slit in each date and remove the pit. Slip 2-3 almonds into each date and carefully pinch closed.

Serve with hot tea, if desired.

Sunday, March 4, 2012

"Sweet" Rice Flour Crêpes


"Sweet" rice flour is a flour made from glutinous or "sticky" rice. It's available at many Asian grocery stores. I found a 5-lb bag of it in a Korean grocery store in Ayer, MA, quite a few years ago and have been chipping away at it ever since. It keeps just fine when closed well and kept in the fridge (most gluten-free flours do better stored in the fridge rather than at room temperature), but somehow there's a little voice inside my head that keeps saying, "use that stuff up!" so I'm always trying to think of new ways to do it.

It's Lent again, so I gave up all kinds of things again for my Lenten fast (a nearly-vegan diet focusing on whole grains, legumes, vegetables, dried fruits and occasional nuts, plus skim milk and homemade skim-milk plain yogurt; no sugars, honey, maple syrup, etc., no caffeine, no alcohol, small portions, no snacking). On Sundays, there is a rule that says you're supposed to indulge in small amounts of what you gave up, to remember that Sunday is always a special day, even in Lent. Me, I like to go for some butter, cheese and eggs. Two of those are represented in this recipe.

UPDATE: I've increased the amount of milk from 1 c. to 1 1/2 c., because I seem to use at least twice what I originally indicated. Start with 1 1/2 c., but be ready to add significantly more. The sweet rice flour just seems to absorb a lot of liquid.

This recipe is heavily based on the basic crêpe recipe from Mark Bittman's How to Cook Everything Vegetarian, which I highly recommend. I made half this quantity (which, in turn, is half of Bittman's recipe), but it involved using half an egg, which is more trouble than most people would consider worthwhile. I knew I was going to use a great, chunky farmstand applesauce for the filling, so I added the cinnamon, nutmeg, vanilla and agave nectar. I recommend adding some kind of flavoring (garlic would be a tasty addition for a savory crêpe), because sweet rice flour is actually a little bland-tasting on its own, despite the name.

If you've never made crêpes before, be ready for a learning curve. (I, for example, just learned while typing this post that the first e in "crêpes" has a circumflex, not a grave accent, on it. After all these years of thinking I was clever. Oops.) But seriously, the first couple may just look horrible, and that's really okay. Make sure your griddle is flat, preferably with low sides, that your batter is very thin, that the heat is at a nice medium level, and that you use butter generously, and eventually you'll probably get the hang of it. At least, I pretty much have, and I'm no great shakes at this kind of thing.

UPDATE: I made these again and took a photo this time!


SWEET RICE FLOUR CREPES (GF, nut-free, vegan)
Serves 2

1/2 c. sweet rice flour
1/2 tsp. cinnamon
1/8 tsp. nutmeg
1/4 tsp. xanthan gum
a pinch of salt
1 egg
1 tsp. agave nectar (adjust to taste)
1/2 tsp. vanilla
1 Tbs. butter, melted and cooled
1 1/2 c. milk, more or less as needed

Whisk the dry ingredients together in a bowl. Beat the egg lightly, then whisk in agave nectar, vanilla, butter and half the milk, and whisk liquids into dry ingredients, mixing until very well blended. Add more milk as necessary to achieve a very pourable batter. If there is time, refrigerate batter for a couple of hours before cooking.

Turn on oven to warm setting and place an oven-safe plate on the middle rack.

Place a griddle over medium heat. When hot, coat well with butter. (I just pick up the whole stick and quickly rub one end all over the hot griddle.) If you overdo this, you'll notice the batter sliding around a little as you add it, so this is one of the many variables to adjust until you find what works best for you.

Check consistency of batter and add milk if needed. I ended up adding quite a lot, maybe even half again what I mention above.

When adding batter to the griddle, the trick will be to tip the pan around quickly so that the batter coats it in as thin a coating as possible. For the first, test crêpe, ladle a small amount of batter, maybe 2 Tbs. worth, into the pan with one hand while tipping the pan around with the other. Cook until the top side looks dry, then flip with a wide pancake turner. Cook until golden brown, then flip back if necessary to brown the first side. Avoid letting the crêpe become crispy. When done, transfer to the plate in the oven or, if it's really too ugly to serve (which it really might be), have yourself a snack, give the dog a treat, or just throw it away.

Add a little more butter to the griddle and now, if you're feeling brave, try a full ladle (about 1/4 c.) of batter, to create a full-sized crêpe. Continue as above (hopefully without feeding the dog again), then start the next crêpe in the same manner. Stack the finished crêpes neatly on the warm plate until all are ready to fill and serve.

To serve, fill with sweet or savory fillings of your choice, roll and sprinkle the top with sliced, toasted almonds, powdered sugar, fresh herbs, or drizzle with syrup or sauce.

Saturday, August 6, 2011

Let's call it "crombler"


Is it a cobbler? A crumble? I'm not sure, because I pretty much improvised as I went along. But, when I was a houseguest of friends in Ohio and they had a glut of fresh peaches needing to be enjoyed, I was happy to take on the challenge of making some yummy, gluten-free desserty thing.


I had a successful second run at the recipe this weekend at my parents' house, with the variation that we substituted some of the peaches with my dad's favorite, blackberries. Both versions were pretty awesome, especially when served warm with a little vanilla or butter pecan ice cream.

PEACH or PEACH-BLACKBERRY "CROMBLER"

2 lbs. peaches (about 4-5) OR 1+ lbs peaches (2-3) plus 1 pt blackberries
1/4 c. maple syrup
1 tsp vanilla
1 c. almond meal, divided
2 T butter or butter substitute, plus additional for greasing
1/4 c. sweet rice flour
1/2 c. firmly packed dark brown sugar
1 tsp cinnamon
1/2 tsp ground ginger
1/2 tsp salt
Optional: pecans, walnuts or almonds, chopped into small pieces


Preheat oven to 350°F. Grease an 8"x10" glass baking dish and set aside.

Peel and slice peaches into a mixing bowl. Add blackberries, if using. Stir in maple syrup, vanilla and 1/2 c. almond meal. Pour mixture into baking dish and spread into an even, shallow layer. If using nuts, sprinkle a thin layer over the fruit. (I didn't measure these, but I'm guessing about 1/4 to 1/2 c.?)

In a small bowl, combine the other 1/2 c. almond meal and the sweet rice flour. Add butter (or substitute) and pinch it in with your fingertips to form a coarse meal. Add brown sugar, ginger, cinnamon and salt and mix well, using the same pinching motion. Sprinkle evenly over the fruit layer.

Bake 40 minutes, or until thoroughly bubbly. Let cool at least 15 minutes before serving. A scoop of ice cream is a very nice addition.


Sunday, January 24, 2010

How to make a cream sauce with no flour and lots of flavor

Yes, it's sometimes going to be a long time between posts. And I mean a loooong time. Sorry 'bout that. Also? This is totally not one of those healthy-eating posts, in the sense that even reading about this quantity of butterfat might just raise your cholesterol about 10 points. But there is some pretty good nutrition here, too, and it's not like I'm suggesting we eat this way every day.

When I was a graduate student in Chicago, I worked at a cafe in Rogers Park called Ennui Café. One of my coworkers was a culinary student who told me her approach to cream sauces: instead of starting with a roux, start with equal parts heavy cream and white wine, and reduce it down about 50%. Finding myself with some extra cream on-hand after making ice cream (more on that later), I decided to give it a try. Another person I met recently had a good rule of thumb for vegetarian meal-building: "a grain, a green and a protein," so I added canned navy beans and frozen, chopped spinach. Knowing that (a) vitamin C increases iron absorption from leafy greens and (b) tomatoes are yummy, I added some canned crushed tomatoes.

I'm still doing my best to use local ingredients, but since I spent most of last summer scuba diving instead of prowling farmers' markets and putting up veggies for the winter, there are a lot of supermarket goods in this one.

By the way, I've decided that there is no point in eating any brown rice pasta other than Tinkyada, ever again. Fin.

Brown Rice Fusilli and Navy Beans with Spinach-Tomato-"Atwell's Gold" Cream Sauce
makes 2-3 servings

2 c. light or heavy cream
2 c. white wine (I used Newport Vineyards Pinot Grigio)

Combine in a medium saucepan over medium heat and simmer to reduce. This will take bloody forever. Try being braver than I was, and turn up the heat a little more to speed up the process.

Meanwhile, put a pot of water on to boil for pasta, and ...

2 Tbs. extra-virgin olive oil
6 cloves garlic (or less, if you're not quite as insane for garlic as I am)
1 c. canned navy beans or cannelini, drained and rinsed
generous pinch of salt
1/2 c. canned crushed tomatoes, lifted out of the sauce with a fork to get as high a tomato:sauce ratio as possible
2 c. frozen spinach

Heat the oil in a sauté pan over medium heat, then crush and add the garlic. Stir for a few minutes until garlic is fragrant and a little bubbly. Stir in beans and salt and cook for about five minutes to allow the starchy beans to soak up the flavors. Mix in tomatoes to deglaze pan and stir until warm. Add spinach and sauté, stirring occasionally, until warm and well distributed, then set aside.

When the pasta water is boiling, check to see whether the cream mixture is at least down to 2 1/2 cups volume. If not, turn the water to low or off and wait. Once it is, ...

2 c. (dry) brown rice fusilli or other short pasta (penne, etc.)

Add to rapidly boiling water along with a generous amount of salt, at least a couple teaspoons. Stir for the first couple minutes, then occasionally until desired tenderness. Drain, rinse and return to pot and toss with spinach mixture, and set aside.

When sauce is reduced to 2 c., reduce heat to low and start adding cheese:

1/2 c. freshly grated Atwell's Gold, asiago or pecorino romano cheese, plus additional for serving

Over low heat, add cheese a small pinch at a time, stirring after each addition until completely incorporated. When all cheese has been added, pour cheese sauce over pasta and spinach and combine over low heat, stirring gently until warmed through.

Serve in a warmed pasta bowl, topped with additional cheese and freshly ground pepper. Mwah!

** If you're dining alone, you can eat possibly deliciously for two nights! The whole thing might reheat well, but I didn't try it. What I did do was the following: Boil only 1 c. pasta and shred only 1/4 c. cheese (+ a little). When the spinach is all thawed and distributed, put half the mixture in a lidded container and refrigerate. When the cream mixture is down to 2 c., put 1 c. in a separate lidded container and refrigerate that, then proceed as above.

When it's time for leftovers, start the pasta first and shred the cheese while waiting for the water to come to a boil. As soon as the pasta's in the water and boiling happily, start warming the cream concoction over low heat. It will look like it's separating and bad things are happening, but I promise it's fine; I just did it. The pasta should be done just before the sauce is warm enough to add the cheese; drain, rinse, and return the pasta to the pot along with the cold spinach mixture. Heat the two together over low heat. Next, start adding the cheese to the sauce, slowly as above. As soon as all the cheese is in, pour this over the pasta mixture and heat thoroughly.

And about dessert ...

I'm feeling downright smug, because I succeeded in making tartufi, or scoops of ice cream encased in a coating of chocolate so that they look like big truffles. I used David Lebovitz's recipe for Chocolate Ice Cream, Philadelphia Style, and his recipe/instructions for tartufi (except that I substituted brown rice syrup for corn syrup because corn syrup makes me cringe), and it was downright easy. Using my brief training as a helper at the now-defunct Ursula's, I drizzled them with white chocolate (which I thinned with whole milk, which I'm not sure was a good move but it made it drizzlable). And then served them over a small pool of raspberry sauce à la Rose Levy Beranbaum.

Plus, I made moose-munch-only-it's-not-moose-munch-because-that's-a-copyrighted-name from Patrick Evans-Hylton's Popcorn book, again substituting brown rice syrup for corn syrup and also mixing unsweetened chocolate about 50/50 with the milk chocolate for a richer flavor. I got a Whirley-Pop recently, and have been giving it a real workout because I loooooove popcorn. I was feeling very intimidated by toffee-involved recipes, and this was messy but overall pretty easy. And it made a lot.


Monday, January 21, 2008

Buckwheat Blueberry Bread

Um.  Hi.

Back when I introduced myself, I believe I mentioned being a teacher. Which may explain my complete lack of posts since before September 1. Still, wow, that's embarrassing. I had such grand plans! But I am still trying to keep to the philosophy, if not the posting, so there's hope. And I have a big backlog of photos of projects that didn't get posted back in the summer. Keep peeking in here from time to time, and I'll try to keep putting something up from time to time.

Like today.

So, how've I been doing? Well, I've trained myself to feel full on much smaller portions, to eat more variety and less cheese, to snack less frequently and to eat ice cream and others sweets much less frequently. I've been taking yoga classes weekly since mid-September, and even practicing on my own sometimes. I've been wogging (alternately jogging and walking on a loop around my neighborhood) sporadically and have taken to ice skating weekly on Thursdays. I've given blood successfully, so my iron count must be fine, and my blood pressure is still nice and low. I haven't gotten around to going to a doctor yet, so I don't know any stats about my cholesterol, but I'm optimistic. And I finally called the office of a new doctor just before sitting down to write this, so I should be back on track with regular health care soon. (Okay, I need a dentist, too. I'm hoping the new doctor might have advice about local dentists who get the gluten-free thing.) I don't own a scale and haven't weighed myself, but I'm wearing one size smaller than I was last summer, and am getting comments from friends at work. I'm working really hard not to let my self-image get tied up in my weight, but I do feel better about myself, nonetheless.

A lot of my healthier eating has taken place through variety and portion control, more than through avoiding fats and sugars. I'm saving money by eating less and making my groceries last longer (and buying fewer of them when I shop).

So the recipe I invented today isn't exactly heart-healthy.

BUCKWHEAT BLUEBERRY BREAD

This is a sweet, almost toffee-ish bread with a crisp, chewy outside and soft inside. It's the descendant of my previous experiments with buckwheat-cornmeal pancakes, which I started doing when I had too much cooked buckwheat porridge and couldn't begin to face eating it anymore.


1 cup cornmeal
1 tsp baking soda
1 tsp baking powder
1 tsp salt
1 tsp xanthan gum
1 tsp egg replacer
1/2 cup butter, softened
3/4 cup brown sugar
1 egg
1 tsp vanilla
1 cup plain nonfat yogurt
1 cup cooked buckwheat porridge
1 1/2 cups frozen blueberries

1. Preheat the oven to 375°F. Grease a 9"x5"x3" loaf pan and dust the bottom and lower sides with cornmeal.
2. In a small bowl, combine the cornmeal, baking soda, baking powder, salt, xanthan gum and egg replacer. Set aside.
3. In a larger bowl, cream the butter with a wooden spoon. Add the brown sugar and cream well to combine. Mix in the egg and vanilla, stirring well until smooth. Add yogurt and mix thoroughly. Add buckwheat porridge, using back of spoon to mash if it has become solid from sitting, and mix until well combined.
4. Sprinkle the dry ingredients over the wet ingredients until the surface is just coated, then mix them in. Repeat until all of dry ingredients have been added to wet, and the batter is uniform.
5. Fold in blueberries until well distributed. Pour batter into pan and use spoon to level top.
6. Bake about 1 hr, 10 min, or until bread is firm and toothpick inserted in center comes out clean.
7. Cool in pan about 10 minutes (which I didn't - oops!), then run a spatula around the edges of the pan before turning bread out onto a rack to cool completely.

Tuesday, August 14, 2007

Summer Peach Bread Pudding

I apologize for the long silence! Many thanks to new commenters theresa and sea for their compliments, and of course to hilary for her constant support. :-) This is a post I wrote a long time ago, when I actually was making this dish, but didn't get around to finishing until now because I was too lazy to upload the photos. Ah, the last days of summer.

Speaking of which, I do intend to keep posting once I'm back to the teaching grind (in, ergh, a few days), but please understand that it will be much less frequent than my intial flurry of posts. I'll try to be reasonably regular with adding things here, though.

On to the food!


Peaches are in season, and the ones from my neighborhood farmers' market are sweet, juicy and scrumptious. I honestly believe that the best thing to do with ripe, in-season fruit is to eat it raw, all by itself. Yum! It also inspires me to try new recipes - and occasionally to improvise, which I've done here.

I had most of a loaf of GF bread in my freezer, of a type that I don't particularly like for toast or sandwiches. This is what gave me the idea of making a bread pudding. I honestly don't know exactly how much I had, so I'm guessing it was about ten slices. If you try this yourself, you may find you need more or less to complete two layers in the dish. I would recommend the softest/airiest bread you can find, and giving it a good, long soak before baking (longer than the 30 minutes I did). My experience was that the peaches and bread all floated up to the top when I poured in the custard, and the bread stayed very dense and chewy, rather than incorporating the custard, which forced me to bake this far longer than the recipe indicates. It was still very tasty, but should definitely be considered a 'work-in-progress.'

Some of the proportions in this recipe were based on the Apricot Bread Pudding recipe in Rebecca Reilly's Gluten-Free Baking. Although it will go without saying on the slighest glance at the ingredients list, this dish falls securely under the heading of 'treat.'

SUMMER PEACH BREAD PUDDING

about 10 slices gluten-free bread, thawed and crusts trimmed off
1/4 cup butter, melted
2 ripe peaches, pitted and skinned
cinnamon, nutmeg and powdered ginger
6 Tbs dark brown sugar, divided
5 eggs
1 Tbs or more vanilla
1 1/4 c. heavy cream
1 1/2 c. skim milk
[2 3/4 c. half-and-half can be substituted for the above two ingredients]

In a 6-cup Pyrex dish, make a single layer of bread by cutting slices to fit like a jigsaw puzzle. Drizzle with half of the butter. Slice one of the peaches into very thin slices, placing it to cover the bread layer completely. Sprinkle liberally with cinnamon, slightly with nutmeg and moderately with ginger. Sprinkle 1 Tbs brown sugar over that. Repeat all of the above steps to create a second layer each of bread, peaches, spices and sugar.

Heat cream and milk in a saucepan over low heat, until very hot but not yet scalded. Meanwhile, beat eggs with a whisk in a medium-sized, heat-proof bowl, then whisk in remaining 4 Tbs brown sugar along with vanilla (I slipped at this point and added at least 2 Tbs worth; luckily, I like vanilla). Whisk in hot cream, gradually, then strain mixture over bread and peaches. (Top layer of peaches may float to the surface.) Allow to stand 30 min.


Preheat oven to 300°F. Place a roasting pan (or other pan large enough to allow your baking dish to sit in it) in the oven, place pudding inside it, and fill the roasting pan with boiling water halfway up the sides of the pudding dish. Cover dish with buttered parchment paper (or foil). Bake for 20 to 30 minutes.


Remove the pudding from the hot water bath (careful - water is very hot and can burn you). Serve warm, or try room-temperature or cold, as you prefer. I found this to be too rich to be enjoyable with any sort of accompaniment (e.g., ice cream), but that may change if the bread is soft enough to get a more classic bread pudding texture than I did on this try.

Thursday, August 9, 2007

Blueberry Scones


My second recipe from Rebecca Reilly's Gluten-Free Baking has been as successful as the first! With my sister staying over and a basket of farmers'-market blueberries in the fridge, I decided to take a shot at making scones. One of the nice things about getting used to baking GF from scratch is that I've started to find that I have all the ingredients already at my house, usually with not more than one or two exceptions. In this case, I didn't have any heavy cream, but I needed some for a frosting recipe that I plan to try later this week, so I didn't mind going out to grab some. (If I'd known I'd need some for this recipe, and that my local Shaw's also only sells cream in pints [not half-pints], I would have ordered some from Munroe for this week's delivery. Ah, well.)

These were really easy to make, and came out very well. My sister, who can eat gluten, told me she thought they were tasty enough to serve to gluten eaters outside the family ... and even to Mom!

Saturday, August 4, 2007

Sour Cream Coffeecake

As is probably obvious by now, I sometimes take a detour from the purely healthy, to try new baking (or other cooking, but mostly baking) projects. The aim is to expand and improve my GF-from-scratch baking repertoire, so that I know I can offer at parties - or bring to school gatherings - things that I can eat and my non-GF guests/colleagues will (and will want to) eat.

Luckily, I have the perfect taste-tester: my mother. She has been very unenthusiastic about some baked goods I've brought home in the past, so if she likes one of my creations, I know I'm on to something. It's like having an in-house Mikey.

She liked this one.

SOUR CREAM COFFEECAKE from Gluten-Free Baking by Rebecca Reilly

After trying only one recipe, I can already say that I wholeheartedly recommend this cookbook to everyone I know. I won't reprint the recipe here, other than my modifications/improvisations, but I do have photos!

This was also my chance, finally to try the silicone tube pan my friend N. and her parents gave me as a housewarming gift. Here it is, all greased and floured (with GF mix) and ready to go.


Notice the old baking sheet sitting under it: a must for silicone bakeware, which is very floppy.

The recipe calls for the streusel topping to contain walnuts, shredded coconut and mini chocolate chips, in equal measure. I wasn't in the mood for coconut or chocolate in my coffeecake (although I love both!), so I substituted almond meal for the coconut and more walnuts for the chocolate chips.

The walnuts I had on-hand were raw, so I toasted them in a dry skillet after chopping.


I then set them aside on a saucer until they were cool enough, so they didn't melt the butter in the streusel. Speaking of which, I was a bit confused at first about the direction to "pinch" the butter into the streusel. I decided to try in literally, by pinching off bits of butter from the stick (with very clean hands, of course) and dropping them into the flour. It worked nicely! It also seemed to work best to use my hands sort of to massage the ingredients into each other. The finished streusel was quite well blended.


The one other change I made in the streusel was to use crystallized fructose in place of sugar, because I had some in my pantry that I was trying to use up. Fructose is sweeter than sucrose, so I had to work out the correct amount to add, relative to the amount of sugar indicated in the recipe. This made a great example to use with my math tutee a couple of days later. Try it yourself: if 1 tsp fructose = 1 1/2 tsp sugar, and the recipe calls for 1/2 cup sugar, how much fructose did I use? (Answer below*.)

Next, of course, came the batter, which was pretty straightforward. Here it is, as I was just adding the dry ingredients to the wet ingredients. Have I mentioned that I love my mixer?


The batter is so dark because the only sugar in it is dark brown sugar. Yum!

Once the batter was mixed, it was time to layer it into the pan, alternated with the streusel. Partway into the second batter layer looked like this:


And then I baked it! The recipe gave different baking times for a bundt pan v. a tube pan, and I wasn't sure which way to go, especially since I'd never used silicone before. I ended up compromising, and went a little longer than the tube pan time, but not quite as long as the bundt pan time. I also did the toothpick test, and it came out clean.

The result:


Now comes the neat part about silicone bakeware, especially for gluten-free baked goods, which are often more fragile than their gluteny cousins. You can peel the pan away!


The center was a little harder, especially because the whole thing was still quite hot. In the future, I will probably wait more than the indicated 15 minutes before trying to remove the coffeecake from the pan.

Still, almost a clean getaway!


And it looked fine, once it was flipped over (impressions from the cooling rack notwithstanding).

When sliced, it looked almost perfect, imho …


… And it made for a very tasty breakfast.

I cut the cake in half and packaged up half of it to give to my friends L. and H. I then wrapped and froze one of the remaining quarters for later. The final quarter, I sliced into four pieces: ate one, gave one to Mom, and put the other two in a container in the fridge for the next two mornings' breakfasts.


* I used 1/3 cup fructose.

Thursday, August 2, 2007

New York City! (long)

My long silence here has been due largely to traveling and to intermittent internet access. I've been in NYC (Brooklyn and Manhattan) since Friday, and have been having a great time! The eating has been spectacular, too ...


I have to admit, although I know the best idea when eating out as a gluten-intolerant person is to call ahead, talk to the chef, etc. But I'm generally too shy/disorganized/spontaneous to do that. So, I rely on recommendations from other people, personal experience, and "safe" dishes like simple salads. One great resource was these posts on Wheat-Free, Meat-Free, about their family's experience traveling to the city.

Also: I'm trying not to be ridiculous about suspending my healthy-eating plans while I'm here, but I'm not skipping dessert when it's my only chance to try something really special.

Most of my dining experiences on this trip have come from places my sister thought might work, places my friend Y. (who is an omnivore) wanted to try while in NYC, and one place I'd eaten before. So far, so good.

Friday night: Chiles y Chocolate, 7th Ave. near Flatbush, Brooklyn. Very helpful server, fantastically tasty food. There was a little confusion that resulted in my initially receiving a plate swimming with rice and beans that I'd already been told were not vegetarian (I think because two servers were sort of tag-teaming our table), but they very nicely replaced it with a new plate that had a heap of steamed/sautéed spinach in place of rice or beans. The main dish was a chile relleno with Oaxacan cheese - a dish which is sometimes batter-fried, but in this case was roasted. Dessert was pan-fried bananas covered with chocolate mousse, and a cup of the house chiles y chocolate (chipotle-spiced hot chocolate) drink! ¡Qué rico!

Saturday: Started the day with a couple of the snack bars I had along, and went to Park Slope Food Co-op mid-morning (where my sister is a member, and could buy some food for me, her houseguest). Managed to get some breakfast and lunch food - yogurt, bread, cashew butter, jelly, some more snack bars - so that we'd only need to eat out for dinner.

Saturday night: Nana, 5th Ave between DeGraw & Douglass, Brooklyn. Most East Asian foods other than Chinese are usually safe, and this was no exception. The server understood my requirement that I be served no soy sauce, and my summer salad rolls and vegetarian maki platter were both excellent, and very fresh.

Sunday night: Long Tan, 5th Ave between Union & Berkeley, Brooklyn. One disappointment in that the fresh vegetarian rolls contained wheat noodles, but I'd rather be informed than get sick! Another excellent meal, starting with heirloom tomato salad with Thai basil, continuing with vegetarian yellow curry, and finishing with mango with coconut sticky rice, all of which were delicious.

Monday lunch: Uncle Vanya, 54th St near 8th Ave, Midtown Manhattan. This was the first meal with my friend Y., at one of the restaurants she really wanted to try. We drank hot tea with cherry preserves (awesome!), and I ate the vegetarian stuffed pepper, which was liberally garnished with fresh dill. Very delicious.

Monday night: Le Souk, Avenue B between 3rd & 4th, East Village Manhattan. Moroccan restaurant with friendly server who knew exactly what I was talking about when I launched into my gluten-free spiel. I had to remind him when he came around with the dessert tray ("oh, um, I guess you can't eat any of this, then"), but still, he took very good care of me. Y. and I shared a very yummy, fresh salad, although I can't remember the details ... and then my main course was a halloumi cheese salad with baked eggplant bits in among the greens. SO good. Since I couldn't have dessert there, we went in search of gelato, and found some in a place (whose name I, alas, forget) at the corner of Houston and Allen.

Tuesday lunch: Risotteria, Bleecker St & Morton St, Greenwich Village Manhattan. The Mecca of gluten-free dining was mercifully quiet Tuesday afternoon around 2pm, when Y. and I finally got back from a long morning of ferrying and line-waiting on and between Liberty and Ellis Islands. Tuesday is pasta day, and we luxuriated in a large, shared salad and giant bowl of penne pesto, and I drank a Bard's Tale beer and ate too many breadsticks and had to take my cupcake and fudgie to go. Simply and plainly, some of the best food I've ever gotten to have in a restaurant. Y. was surprised and pleased at how good gluten-free pasta can be.

Since lunch was late and huge, I just snacked on my dessert things in the evening, rather than having dinner. They were entirely delicious.

We did have some gelato from Ciao Bella, after failing to find the gelato place we'd been seeking, in the late afternoon.

Wednesday lunch: Les Halles, Park Ave between 28th & 29th Sts, East Side Manhattan. Anthony Bourdain's Manhattan restaurant offered some truly delicious food, and the one place I felt a little as though I may have accidentally ingested some gluten. My server didn't seem to have any idea how to deal with gluten intolerance, although he made a good effort. I had a delicious sweet potato soup, served at room temperature with slivers of parsley, followed by salade d'auvergne, which included mixed greens, sugared walnuts, apple (pear? can't remember) and one tiny piece of bleu cheese. My understanding is that most bleu cheese is no longer made with bread mold, but it's possible that this was the exception. In any case, it was shortly after that course that I had some minor belly cramps. I did stay for chocolate mousse (and was feeling better by the time our server remembered us to ask about dessert), which was delicious - very rich and dense.

That afternoon, we tried again and succeeded in finding Il Laboratorio del Gelato. It was well worth the search! Some very slow service (and one inept counter person) notwithstanding, the gelato was definitely the best we had this week, and probably the best I've had outside Tuscany. Around the corner was Babycakes, where I totally bought too many baked goods, then we stopped back by Il Laboratorio so that Y. could get a second helping of the honey lavender gelato. I'd had a medium the first time, and ate a chipwich at Babycakes, so there was no possibility of my eating anything else.

Wednesday after-show supper: Havana Central, 46th St. between 6th & 7th Aves, Theatre District Manhattan. We saw Mamma Mia! on Broadway, and were still full of gelato, so saved supper until after the show. In the playbill, we read about a place around the corner from our hotel, which sounded tasty, so we headed over there. Live Cuban music greeted us as we entered, and I immediately ordered a Moradito (blackberry mojito), then shared small plates of maduritos (fried ripe plantains) and moro (black beans and rice), and a "vegetarian cobbano" salad, which was delicious but way too huge to finish.

Thursday brunch: Park Plaza Restaurant, Cadman Plaza West at Pineapple Walk, Brooklyn Heights. After crossing the Brooklyn Bridge on foot, Y. and I met my sister at the Park Plaza Restaurant for brunch. The iced coffee was refreshing in this hot weather, the "la guadelupe" omelette was quite tasty, and the grits were excellent. Also the server honored my request not to bring me toast. Turned out to be a lot of food for me, even after a week of expanding my appetite with vacation-portion eating, but very good.

After such a big breakfast, we decided to miss lunch and plan for an early dinner. In this hot weather, we spent most of the afternoon resting, but decided to venture out after some fine chocolate around 3pm.

Thursday afternoon snack: La Maison du Chocolat, 49th St near 6th Ave (NBC Studios building), Diamond District Manhattan. A selection of chocolates and a perfect single espresso were a lovely treat.

And finally, Thursday dinner: Dervish, 47th between 6th and 7th, Theatre District Manhattan. After a week of heavy, rich food, I was most interested in some light plates at this fine Turkish restaurant. Our server seemed a bit taken aback at my dietary needs, but suggested that I name the dishes that interest me, and he would confirm whether I could eat them. I ended up with two appetizers: a stuffed baby eggplant with onions, garlic, pine nuts and parsley, and a plate of stuffed grape leaves (dolma). The dolma had a sort of sweeter spice blend than the Greek version I've had more recently, and were delicious; the eggplant was excellent, too. For dessert, I had a poached pear in berry coulis with a dusting of ground pistachios, and also some of Y.'s milk pudding with almonds, which was rich and mild. A perfect ending to a really good week of eating.

Which brings us to now, the night before I return to Rhode Island. I don't have big plans for tomorrow's breakfast, so this is it for the gastronomical madness.

Coming soon: my long-overdue post on the sour cream coffeecake I baked last week.
Monday, July 16, 2007

Sometimes, you gotta have starch


One of my very favorite foods is fusilli al pesto. I just love the spring of the twisty noodles and the perfection of basil, garlic and olive oil. Having bought a new brand of rice pasta at Spezia the other day, I decided last night that it was time to try it. I also pulled out a couple of the "garlic knots" that I'd bought, frozen, at Risotteria last February. I was sadly disappointed by th garlic knots ... they were supposed to be baked for 10-15 minutes, but after 30 minutes were still unpleasantly doughy.

This is one of the shortfalls of saving heavier foods for "treats." Sometimes they ... aren't.

But, the pasta was delicious. I really like this brand, and will buy it again. Eventually. My next pasta, though, will be of my own making. (I mean, other than the pasta already in my pantry, which I may eat before I get around to trying my hand at homemade GF pasta.)

I feel an ode to my Kitchen Aid mixer forthcoming. I seriously love that thing.

Sunday, July 15, 2007

Cheese grits, and giving blood

I'm kicking myself, right now, for not taking a photo of breakfast before we sat down to eat it. I had the table so nicely laid-out, with a pretty table cloth and everything. *sigh* C'est la vie, I suppose.

My friends T. and R. were visiting (my first houseguests at my new house!), and I made us all breakfast this morning. Really, I just rewarmed some of the zucchini muffins from the other day, rinsed and put out some blueberries I got at the farmers' market yesterday, and made cheese grits, because T. loves them.

Adapted from the recipe on the Quaker Quick Grits package, here's how I made the grits:

1. Heat a very small pat of butter on medium low heat. Add 1 clove of garlic, pressed, and heat until fragrant. Add a dash of oregano.
2. Stir in 2 1/2 cups of water and bring to a boil.
3. Once the water is boiling, slowly stir in 1/2 cup Quaker Quick Grits (or similar), then reduce heat to medium-low and cover. Cook, stirring occasionally, about 12 minutes, until thick.
4. Add 4 oz. shredded cheese (I used Hunter's Seriously Sharp Cheddar from Cabot Creamery), and stir to blend. Stir in a dash of ground cayenne pepper.

I probably should have added a pinch of salt, to bring out the other flavors. I was afraid the cheese would be too salty, but it really wasn't.

Makes 4-6 servings.

***

The big breakfast happened for two main reasons: company, and my plan to give blood today. We had also made plans to meet up with our friends N. and K. for ice cream, which I usually consume in large quantities after giving blood. I need the calories and blood sugar, and it's a great opportunity for a much larger portion of treat than I would normally (these days) consume.

Trouble was, people who have lived in Mexico are not currently allowed to give blood. Apparently, there's a newly-discovered blood-borne illness, and the RIBC isn't set up to test for it yet, so they're not accepting blood from anyone who has lived in Mexico or Central or South America. Wah. So much for my plan to give blood and then gorge on ice cream! Well, I still had ice cream, just a little less of it. (And, I've been told, I should be able to give blood again starting next month.)

I've only had ice cream one other time this week (gelato, actually), so I'm still making progress at eating more healthily overall. And darnit, this isn't about having to justify every bit of fat and sugar I eat (I tell myself ... but it's still hard to believe, sometimes).

It was a really nice day for sitting in the gazebo in the park with our ice cream, I have to say.

Thursday, July 12, 2007

Zucchini muffins!

I like to think there's a difference between obsessively thinking about food all the time, in a compulsive overeater sort of way, and thinking about food frequently because cooking creatively is a hobby and a joy. Sometimes, especially when I have perishable ingredients on hand, I like to daydream about how to use them best.

As I've mentioned, I went a bit overboard at the farmers' market last weekend, so I am now frantically embroiled in what my friend L. calls "the race against the rot." I've been eating salad at such a frantic pace that my broccoli - my favorite vegetable, as long as I can remember - is lying neglected at the bottom of the crisper.

Which means, of course, that the zucchini hardly stood a chance. Until I remembered about zucchini muffins.


I've never made them before, but luckily I had all the ingredients on-hand for Bette Hagman's recipe (from The Gluten-Free Gourmet), except the raisins, which I don't really like in zucchini muffins, anyway.

They came out very small, but toasty/crispy on the outside and moist/spongey on the inside. Absolutely lovely.

Despite having used organic white sugar, and the recipe calling for oil rather than butter, I decided these probably fall under the category of 'treat,' so I filled up most of the way with a bowl of brown rice, first, and then had my one muffin with a small glass of milk.


There's something really fantasic about fresh-from-the-oven muffins for breakfast. But, wow, is summer a rough time for having the oven turned on to 400°F (204°C)! Something to remember, as I plan other baking experiments for the rest of the summer.

Wednesday, July 11, 2007

A little bit of junk-ish food

One of the keys to making this healthier-eating plan a possible one is that I never tell myself, "you can't eat that ever again." Unless it's, you know, meat or gluten. I can still enjoy barbeque-flavored kettle corn from Popcorn, Indiana, but now I'm trying to eat it kernel by kernel, not handful by handful.


Luckily, I already prefer 100% juice blends (like Apple & Eve berry punch) to cokes. Actually, after all the water I've been drinking this week, I was afraid the punch would taste too sugary. It was mostly just nice, though.

A little popcorn, a little juice, a little TiVo. A nice way to take a break from a hot, sticky afternoon.

Tuesday, July 10, 2007

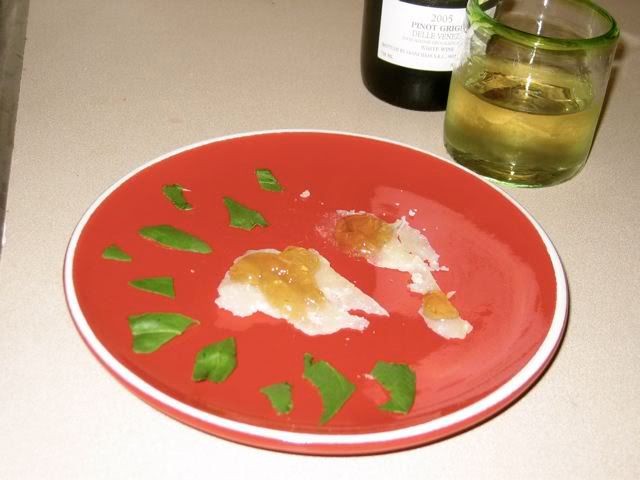
Pecorino, honey jelly, basil and pinot grigio

In Europe, or so I hear, it's common to follow meals with cheese instead of sweets.

I was feeling a bit hungry after the brown rice/spinach/tomato extravaganza from earlier this evening, so I thought I'd finish up with a bite or two of the pecorino I bought this afternoon.


(note to self: the red plate is pretty, but it doesn't photograph well)

This is, alas, not the cheese I hoped it would be. (Somehow, that sounds to me like the basis for a Saturday Night Live sketch. But I digress.) I was entranced with the soft, mild pecorino I had the fortune to eat in Tuscany a couple of summers ago, but this is a hard, crumbly, salty cheese.

Nonetheless, it's very, very good. And its saltiness makes it lend itself well to very small portions.

Something I learned in Tuscany was to eat pecorino with honey. I happen to have some "Lemon Crest" from Magnolia Honey Jelly, so I thought I'd try that. Then I decided the plate needed some green, so I tore up a basil leaf to arrange artfully around it. Finally, I poured myself a small measure of some pinot grigio that I was given as a thank-you gift for playing in a master's conducting recital, which was open in my fridge. Normally, I prefer red wine, but the sweetness, saltiness and crispness of the honey, cheese and basil seemed to want to be paired with white.

Perfection! The jelly balanced the saltiness of the cheese, and the basil cleansed the palate between bites of richness. (And the wine, of course, didn't hurt one bit.) It only took a very small quantity to make a very satisfying end-of-day snack.

Eating Treats Possibly

I'm lucky enough to live in a place where there are some WONDERFUL gluten-free treat options. One of my favorites is Ursula's European Pastries in Cranston, RI, for the cakes-and-pastries type of treat. Twist on Angell is excellent for the pizza-and-beer (or pasta) type of treat. I used to frequent both, well, frequently, partly because of the novelty of having such an abundance of options, and partly out of a desire to keep GF-friendly businesses doing GF-friendly business.

Since moving into my new house, and since the summer started, I've been spending a lot less time at both. Partly, they're not cheap, and partly, those are some rich/caloric/high-fat treats. Staying on a gluten-free diet, it's very tempting to try every new product that comes along, to reconnect with old "friends" that have been lost to me because of the evil grains they contain (I say, tongue firmly in cheek). Until about a month ago, I was living on cheese and starch, eating ice cream and cookies and cakes at least daily, which I knew was not a pattern I should be preserving.

As I develop my "possible eating" philosophy, my question for myself becomes this: how do I see the role of treats in my diet? As I try to get away from my emotional eating habits, I want to stop thinking about treats as something I "earn," but I still want to enjoy them on special occasions. I am serious about not wanting to deny myself these treats entirely; the solution seems to be, in fact, the word "treat." I want to divorce cakes and cookies and pizzas from the value judgements of "bad" or "good" and from loaded words like "indulgence," that make them sound like a surrender. I can eat rich, sugar-and-butter-laden baked goods, and still be eating, overall, in a healthy manner. The key, I think, will be frequency and quantity. I am ready to pass by gluten-free goodies in the market, knowing I can try some later. "Moderation in all things," as a friend of mine from the Catholic choir at my university said, "including abstinence."

So, how do I feel about my plan to stop at Ursula's this afternoon being thwarted by their two-week summer vacation? Was I saved from my temptation to 'cheat'? I don't think so. I haven't been there in over a month. Plus, by getting off the bus at that point, I ended up having to walk the mile-plus home from there.

I had stopped earlier at Spezia market on Federal Hill, which has a decent selection of gluten-free products, some of which I hadn't seen before. I bought three items I haven't found elsewhere: Orgran amaretti-style cookies (very low percent of calories from fat, I discovered to my delight, and the sugars are unrefined), Scotti Pasta Riso fusilli (a brand I've been curious to try), and a sliver of Pecorino Toscano (D.O.P.) cheese. Once I discovered Ursula's to be closed, I decided to enjoy a couple of the amaretti on the walk home.

A good compromise, I think. And quite a tasty treat.