Tuesday, January 1, 2019

Black-Eyed Peas, 2019 Version

As long as I can remember, my parents have made and eaten Hoppin' John for New Year's Eve/Day. I have a brief and vivid memory of my godfather smiling at me, just after midnight one year, with a plate and fork in his hand. Black-eyed peas—the central ingredient of the dish, along with rice and spicy sausage—were meant also to be a key ingredient for good luck in the new year.

I thought they were yucky. But then, I was that kind of kid.

Years after becoming a vegetarian, I warmed up to legumes of various kinds, but the hot Italian sausage in my mom's recipe meant I always had to improvise a bit. I took years, but by about a decade ago I was able to make a version I enjoyed, partly thanks my 1998 discovery of the "Garlicky Black-Eyed Peas and Greens" recipe in the Moosewood Restaurant Low-Fat Favorites cookbook.

This year, I was introduced to Beyond Meat Hot Italian Sausage, which inspired me to try my mom's recipe… and then I forgot to get it from her, and I wanted to include the greens, and I generally decided to go my own way.

~*~

Ok, I admit it. I had pretty much abandoned this blog. But today, I posted this photo of this year's version of black-eyed peas:
…and my friend Vickie very kindly and quickly responded that she wants my recipe. So, here we go.

Black-Eyed Peas, 2019 Version

Ingredients:

2 Beyond Meat Hot Italian Sausages
1/2 medium onion
Crushed red pepper
Salt
1 red bell pepper
3 cloves garlic
1 can (15.5 oz) black-eyed peas
1 large bunch collard greens
Fresh-ground black pepper

Method:

Heat a cast-iron skillet over medium heat. Slice the "sausages" about 1/4-inch thick and, when the skillet is hot, add the slices.

Dice the onion. After the sausage has cooked long enough to turn over (about 7 minutes), use a spatula to turn each slice over and move them to the edges of the skillet. Add the onion to the middle of the skillet and keep cooking, adjusting the heat downward slightly after a few minutes. Stir around occasionally as needed. Add crushed red pepper (I did a pretty liberal shake over the whole skillet) and salt to taste (maybe 1/4 to 1/2 tsp at first) after the onions have softened.

Dice the red bell pepper and add to the skillet, giving everything a gentle stir.

Peel and mince the garlic and set it aside until ready to add the beans (black-eyed peas) to the skillet.

Empty the can of black-eyed peas into a colander, rinse well with cold water, and drain thoroughly. Once the red bell peppers are becoming tender, add the garlic and the beans to the skillet and stir with the spatula. My skillet was becoming very full by this point, so I had to operate carefully!

Using a sharp knife, remove the spines from all collard greens leaves, stack several, and slice them thinly. My slices ended up about 1/4-inch wide by a couple inches long (I had to cut some leaves again lengthwise to get uniform lengths). Place all strips into the colander and rinse well, then shake off some of the excess water. Add the greens to the skillet along with some more salt, then cover a wait several minutes for the greens to steam.

Once the greens are brighter in color and have softened somewhat, add pepper to taste and stir everything carefully (and as thoroughly as possible) with the spatula until everything is as mingled as possible. Taste and adjust seasoning as needed.

Serve warm. Makes probably six servings or so.

~*~

Good luck in 2019!

Wednesday, March 19, 2014

PB&J Banana Bread

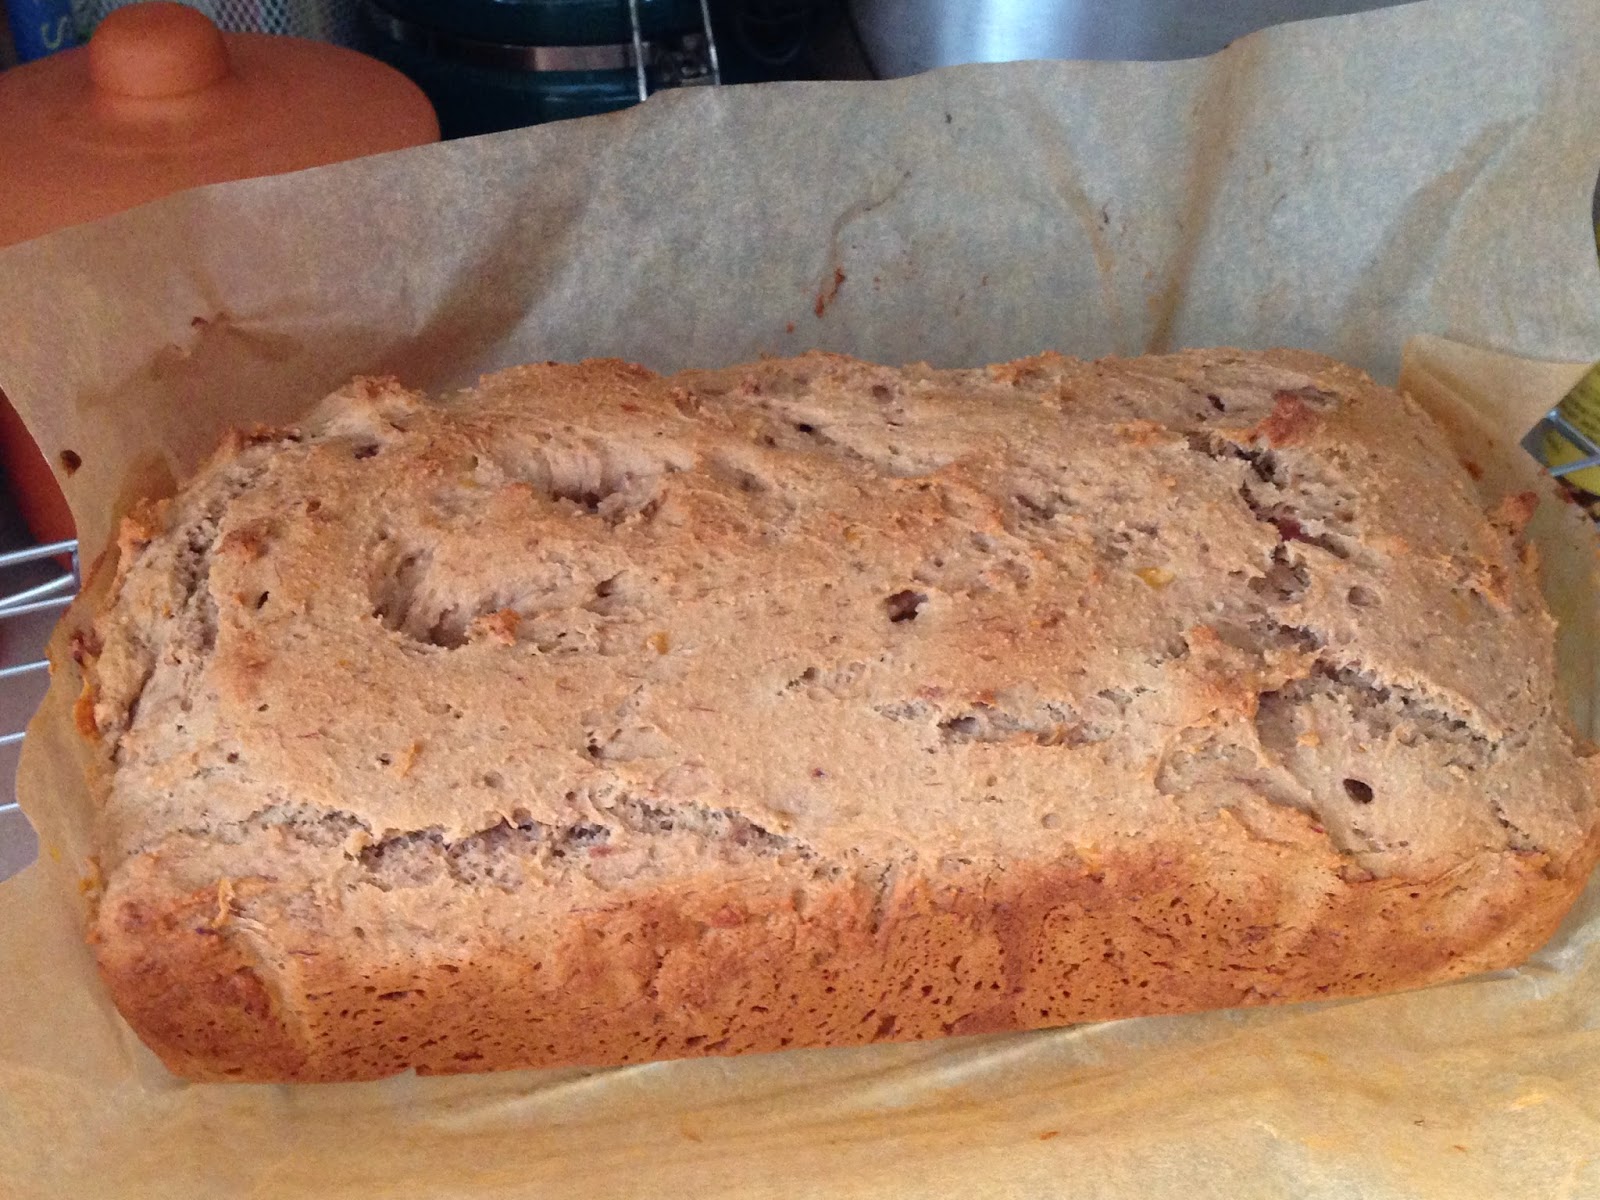
I'll be honest: there was a moment, as I slid the loaf pan into the oven, when I thought: This is going to be heavy and dry. And possibly inedible. I should really have tried the original recipe first, or at least gone with a more familiar substitution like apple sauce.

I was very relieved to discover how wrong I was!

Welcome back to Lent, when my baking experiments get a little weird. Once I again, I set aside consumption of various things I normally love, including sugar and (at least most of the time) butter, cheese and eggs.

I was trying to explain the reasoning behind this to a friend a few weeks ago, and it didn't go very well—partly because my friend was feeling silly while I was trying to answer seriously, and partly because my usual words were not quite resonating for me. And then, on the first Sunday in Lent, I heard another friend, Rev. Meaghan Kelly of New Church, preach on the subject of giving up coffee—not for Lent, just in general. To paraphrase, she said something like, I realized I needed a cup of coffee to feel like the world is a good place. And if I'm depending on a beverage to feel like the world is a good place, I probably need to stop drinking coffee for awhile. [She may not have said "for awhile." My brain can't fathom the alternative, though, so I'm going to pretend she did.]

And I guess that's what I do when I set aside (I prefer that phrase, rather than "give up") consuming coffee, tea, alcohol, sugar, television, fiction literature ... all things I enjoy and consider to be evidence that the world is a good place. I need to stop escaping and start reconnecting with friends, family and God.

Which probably makes recipes like this one a little beside the point. Because I definitely would have a harder time considering the world a good place if I couldn't have peanut butter. But, six and a half weeks is just a really long time to go without the occasional sensory pleasure. And the flavor and belly-filling heartiness of peanut butter come through really nicely in this modified recipe based on Rebecca Reilly's Peanut Butter Banana Bread.

A couple of notes: I buy my natural peanut butter (peanuts and salt, only) and fruit-sweetened fruit spread (which I call "jelly") at Trader Joe's, but you can find them in a lot of stores. This bread is not at all sweet, but does have nice, subtle flavors that hint mostly at peanuts and banana. I used strawberry fruit spread, but couldn't really taste it in the bread, so any flavor should be fine.

I was really pleased with how fluffy and nicely-browned this turned out!
The concentrated fruit-sugar in the jelly must have been enough to get some nice browning going.

PB&J Banana Bread


1 c. brown rice flour
2/3 c. potato starch
1/3 c. sweet rice flour
1 tsp. baking powder
3/4 tsp. baking soda
1/2 tsp. xanthan gum
1/4 tsp. coarse sea salt
1/2 c. natural peanut butter
1/2 c. fruit-sweetened fruit spread
2 ripe bananas, peeled

Preheat over to 350°F. Line a 9"x5" loaf pan with parchment paper.

Combine all dry ingredients (brown rice flour through salt) in a bowl. Stir gently with a whisk to homogenize a little.

Place peanut butter, fruit spread and peeled bananas in the bowl of a mixer. Mix on low, then speed up to medium for a couple of minutes, until bananas have incorporated completely and mixture is starting to lighten. Turn off mixer.

Add dry ingredients, then turn mixer on low speed and mix until just completely incorporated.

Use a rubber spatula to spread the batter into the pan. It will be very stiff and seem a little sticky and dry. This is okay, as it turns out!

Bake 40 minutes, until a toothpick inserted in the center comes out clean. Use the parchment paper to lift the loaf out of the pan, and cool on a wire rack at least 10 minutes before slicing.

Makes about 10 generous slices.

Delicious with a glass of milk, or some herbal tea! [Herbal tea is not made from tea leaves, so I do drink it during Lent. Trader Joe's Ruby Red Chai with milk was a perfect accompaniment, this morning.]

Tuesday, December 24, 2013

Cheese Straws

Ah, cheese straws. Is any food so reminiscent of my childhood? One bite, and I'm back in my grandmother's kitchen. And oddly enough, she didn't make them as straws, but as crisps, flattened with the back of a fork (and containing, if I'm not mistaken ... Rice Krispies??).

So, if you don't have a cookie press, you can still make these. Grandmother always did. She must have also made them without a food processor, but I don't, and I'm not even exactly sure how to modify the technique, so I'll leave that to you.

Right away, I know I'll get push-back for using a cheese other than cheddar, but give this a chance. Cheddar has a higher fat content and a sharper taste, and actually gets in the way of the ideal texture and flavor. Try it my way. Once. Then, do as you will.

I switched from butter to shortening after my first attempt (using butter) went flat in the oven and came out a little too delicate in texture. I may try a combination, next time, but I'm pretty happy with these results.

Recipe inspired by related recipes in The Joy of Cooking (Rombauer & Becker) and in Gluten-Free Holiday Baking (Ellen Brown).

CHEESE STRAWS


about 1/2 lb gruyere cheese
1/2 c. standard GF blend (I used Bob's Red Mill)
1/4 c. sweet rice flour
1/4 tsp. salt
about 1/2 tsp cayenne pepper
4 Tbs. non-hydrogenated vegetable shortening (e.g, Spectrum brand)
a few Tbs heavy cream

Preheat the oven to 350F. Line a few baking sheets with parchment paper.

Grate the cheese, using the medium grate attachment of the food processor. Remove the shredded cheese from the food processor bowl. There should be about 1 1/2 cups. There is no need to wash the food processor.

Combine flours, salt and cayenne in the food processor bowl and fit the blade attachment. Pulse a few times to mix. Add the shortening, then process until the mixture becomes fine granules. Add the cheese, and process until homogeneous. The dough will be dry.

While processing continuously, add a tablespoon or two of cream. Continue to add small amounts of cream until the dough just comes together in a ball that travels around the bowl, with the blade.

Remove the dough to a cookie press and spritz out in straws. Return any short pieces to the bowl, to try again. They can be placed pretty close together, as they shouldn't spread too much.

Bake at 350F for 15 minutes, until golden. Cool thoroughly, and store airtight.

Enjoy!


Sunday, September 1, 2013

Whole-grain GF Waffles

Waffles are really not that hard to make. So why have I been so intimidated by them, most of my life?

Sure, you have to get the dry/liquid balance right. There's the question of whether or not it's necessary to separate the eggs & beat the whites. The waffle iron has to be adequately seasoned or oiled, so the waffles don't stick. And, if you get ever-so-slightly over-generous when pouring the batter, you'll meet with the inevitable heartbreak and anguish of waffle-iron overflow. Oh, the tears and recriminations! [Pretty sure that last line was stolen from an episode of Buffy I just re-watched.]

Okay, there are challenges. Granted. But now that I've made waffles a handful of times from batter, I think I've developed a pretty good feel for avoiding these most common pitfalls. (The egg question, by the way? Doesn't seem to matter for my standard waffle iron. I think it might make a difference when using a Belgian waffle iron.) The logical next step, I decided, was to take a little more control over what goes into the waffles—more whole grains, no sweeteners because the syrup takes care of that—and that means making them from scratch.

Equipment recommendation: If your waffle iron needs to be greased, and you're like me and don't tend to keep cooking spray around, get a silicone pastry brush. I grabbed a pair from Ikea the last time I was there, and while they're not wonderfully delicate for use in actual pastry, they are fantastic for lightly brushing oil or melted butter onto a hot waffle iron.

If you have a shelf or two full of gluten free cookbooks, as I do, then you may have noticed the two things I've noticed: (1) a lot of GF cookbooks don't bother with pancakes or waffles, and (2) when they do, the recipes often seem to be unnecessarily complex. I'm just not going to mess with all that when I'm hungry after church on Sunday. But, fortunately, Artisanal Gluten-Free Cooking, by Kelli Bronski and Peter Bronski, contains a pretty straightforward waffle recipe that I was able to use as a guide. I halved their recipe and still made enough for four full-sized waffles on my Cuisinart Round Classic Waffle Maker [link provided as a size reference]; I also changed the flour blend, because my main objective was to used whole-grain flours.

Bob's Red Mill, which is pretty widely available these days, makes all of the types of flour I used, plus xanthan gum and a baking powder I believe is GF. Argo baking powder, which is what I had on-hand, is also GF.

WHOLE-GRAIN WAFFLES


1/3 c. millet flour
1/3 c. sorghum flour
1/4 c. teff flour
1/4 tsp. xanthan gum
1/4 tsp. salt
1 1/2 tsp. GF baking powder
1 egg, separated if making Belgian waffles
3/4 c. milk
2 Tbs. unsalted butter, melted, plus a little extra for brushing the iron, if needed
maple syrup, fruit, or other topping as desired

1. Measure the flours, xanthan gum, salt, and baking powder into a mixing bowl. Whisk to blend.
2. Plug in waffle iron and set to desired darkness (if settings are available), a little lighter than for refined-flour waffles.
3. If separating the egg, place the white into a separate bowl, big enough to accommodate beaters or some vigorous whisking. Beat until stiff peaks form, then set aside.
4. Add the egg yolk (or whole egg) and milk, and mix well. Drizzle in the melted butter and mix until well-combined. If the white was beaten separately, fold it in, gently, until just incorporated.
5. When the waffle iron is ready, brush it lightly with melted butter, then add enough batter to fill the center of the iron bed, leaving about a 2-inch border when the batter has been spread out a little. It will expand toward the edges! Adjust the quantity as needed for your particular machine.
6. Leave the waffle iron alone until it indicates that the waffle is done, then gently remove it with a heatproof utensil such as a silicone spatula. If you have hungry people waiting, pop the hot waffle onto someone's plate and pass the syrup! Otherwise, place the waffle on a baking rack so it doesn't get soggy. Cool waffles freeze well and can be reheated in a toaster or toaster oven on a busy morning!

makes 4 large, round waffles


Monday, August 5, 2013

Cooking when possible

I'll tell y'all a secret: When I'm not blogging about my cooking and eating habits, there's a good chance it's because they haven't been stellar. At least, that's been the case for a lot of this summer. (If it's during the school year and I'm not blogging, I'm probably just insanely busy.)

But! I'm finally into a relatively unscheduled week, and decided to celebrate by following these two simple steps:

  1. Go to the Pawtuxet Village Farmers' Market on Saturday morning. [Insert your local market or grocery, as applicable.] Buy a small quantity of a few different vegetables that look tasty.
  2. Consult Mark Bittman's How to Cook Everything Vegetarian to decide what to do with the haul.
I ended up with this delicious thing:

Pan-Grilled Corn with Chile (p. 289), plus grape tomatoes, because yum
I'll admit it: I love fresh, summer (or fall) corn, but eating it off the cob doesn't always appeal. This is a little bit because of the messiness, and a little more because it feels wasteful to boil a large pot of water, just to cook an ear or two for myself. So, I'm always on the lookout for a good off-the-cob recipe, and this one was fantastic: the corn got cooked just enough to bring out the natural sweetness, while staying crisp and fresh. The tomatoes were my own addition (along with a little olive oil), and because I only had two ears of corn v. the proscribed six, I probably ended up going a little heavy on the chile and garlic. I didn't mind.

And by the way? A thousand blessings on whoever thought of combining cilantro and lime juice. Probably someone in Mexico, centuries ago. Blessings, nonetheless.

I only wish I'd bought more corn!

Thursday, August 30, 2012

TGRWT #22 - Kelley's Cucumber Ice Cream Dream

Blog Owner's Note: This post features research and writing by fabulous guest blogger, Kelley Caspari! This is her entry into Round #22 of They Go Really Well Together. Click the link to learn more about this blog event and the science behind TGRWT. It's pretty cool stuff! And as always on this blog, the recipe is totally vegetarian (obviously not vegan) and gluten-free. And it sounds delicious!

***


A couple of years ago I had a dream. The only thing I could remember of it on waking was a delicious flavor of ice cream I'd had - cucumber-raisin. I actually mentioned this to an ice cream maker and he looked at me like I was unhinged. Ah well! I promised myself that one day I'd make it. And this month Khymos suggested a new TGRWT (They Go Really Well Together) starring the raisin! If that isn't the Fates calling me to  the task, I don't know what is...

I did a quick search on the web for cucumber ice cream, and there were several recipes. The one that sounded best included a bit of lemon and lime. He calls it "Cucumber Ice Cream: The Corrupter". He's right. This ice cream is delicious!

Next, I had to find a way to make the ice cream. I don't have an ice cream maker and I don't really want to own one. Fortunately, there is a method for making a single serving of ice cream in about 5 minutes with Ziploc bags. Here is a link describing that method.

That's the background. Now my "research":

I found that the Cucumber Ice Cream Corrupter was a bit to sweet for my purposes and taste, so I modified the recipe, both for sweetness and in reducing the amount of base for the technique I planned to use.

When I added raisins, I found that the ice cream melted in my mouth too quickly, leaving me chewing and chewing and chewing the raisins long after the cucumber flavor had disappeared. Even mincing them didn't help this problem. I settled on throwing the raisins into a food processor with honey and lemon juice and pureeing the heck out of it.

This makes 2 servings:

The Cucumber Ice Cream Base:

1/4 C half and half
1/4 C heavy cream
1 large cucumber, peeled, seeded, chunked
Peels from about 1/2 the cucumber
2 TBSP sugar
1/2 TBSP lime juice
1 TBSP lemon juice
Salt to taste

1. Purée the cucumber in a blender with the lemon and lime juice.

This can take a bit of patience, alternating blending with tamping the chunks of cucumber down until it starts to behave like a liquid in a blender.

2. Heat the half and half, cream, sugar, and cucumber peels over low heat until the sugar is just dissolved, stirring constantly.

The peel is supposed to add a green color, but it doesn't seem to do much in that department, so you could probably leave them out altogether, though I think it may add to the texture.

3. Strain the cucumber mixture into the cream and mix.

I questioned whether straining was necessary, and after trying it with and without, the final texture is remarkably improved by pushing the cucumber through a fin sieve.

4. Add salt to taste. I added just a pinch.

5. Chill at least 3 hours or overnight.

The Raisin-Honey-Lemon "Ribbon"

1/2 cup raisins
1 TBSP lemon juice
1TBSP honey

1. Put raisins in a small pot and just cover with water. Simmer until almost all of the water is gone. The remaining water will be a bit syrupy.

2. Put raisins with their syrup in a food processor with the lemon juice and honey. Purée until you are satisfied.


To freeze:

5 minute timer
1 gallon sized Ziploc bag
1 pint sized Ziploc bag
Ice to fill 1/2 of the gallon Ziploc bag
6 TBSP salt
previously made Cucumber Ice Cream recipe


1. Put serving bowls in the freezer. The ice cream can be a bit soft and melt quickly. A frozen bowl stalls the process.

2. Put Cucumber Ice Cream Base in the pint sized Ziploc bag, filling it about halfway. Fold the top over so most of the air is removed, and seal it.

3. Put salt and ice in the gallon sized Ziploc bag.

4. Put pint sized bag into the gallon sized bag, remove as much air as possible again, and seal the gallon sized bag.

5. Set a timer for 5 minutes

6. Shake, roll, knead, and whatever other movement you can think of to keep the bag moving. I favor rolling the bag in a kitchen towel to keep my fingers from freezing, and continuously rolling the bag over and over while roughly kneading it. Be rough! If you are too delicate out of fear the bags will lose their seal you will get soupy ice cream!

7. When your timer tells you 5 minutes have passed, pull the bowl from the freezer, take the pint sized bag from the gallon sized bag, and give it a quick rinse under cold water. This is essential unless you want salty water in your ice cream! I tend to give the pint sized bag a quick rub with the kitchen towel, too, just for insurance.

8. Empty the ice cream into your bowl.

9. Fold in about 2 TBSPs of the Raisin mixture very minimally. Too much and you will over power the cucumber flavor, so less is better if in doubt. You can even just spoon in a bit on the side if you prefer.

10. EAT! YUM!

Tips:
You can fit more than one pint sized bag into one gallon sized bag.

You can store this in the freezer, but it gets quite hard overnight.


***

Many thanks again to Kelley for all her work, and for sharing! Best of luck with this entry!

Sunday, May 6, 2012

Bourbon-Infused Popcorn

Okay, attempt number one at bourbon-infused popcorn.

I heard a bit on NPR a few weeks ago about a gourmet food show which included "artisanal" popcorn offerings. (And seriously? Can we just ban the word "artisanal" already?) But back to the topic at hand, in the course of the story, I heard a magical three words: Bourbon. Infused. Popcorn.

Not one to spend $12 on a few ounces of popcorn, I decided to try to make my own at home. The results were not as bourbon-ish as I was hoping, but definitely tasty.


I started with about 1/2 c. unpopped kernels and put them in a tiny jar with the last of a nip of Knob Creek, which was left over from an egg nog ice cream attempt back around Christmas. I probably had about 2 Tbs of bourbon, total, which wasn't enough to submerge all of the kernels. So, I turned the jar over periodically to distribute the bourbon as well as I could, while there was still excess liquid.

This probably sat around my kitchen for a couple of weeks. Another time, I would use a shallower dish, more bourbon, and also probably spread out the kernels to dry a bit after soaking for a shorter time, like overnight or so.

Anyway, I popped the popcorn as usual, with a generous drizzle of canola oil and about 1 tsp salt, in my Whirlypop, until the popping noises stopped. Meanwhile, I melted 1 Tbs unsalted butter in a small dish, about 30 seconds in the microwave.

Then, I transferred the popped popcorn to a muslin bag, drizzled in the butter, and sprinkled it with an additional pinch of salt (which I think was too much, I'll leave that out next time) and about 1 Tbs cinnamon-sugar, which is 2 parts sugar to 1 part ground cinnamon, and keeps indefinitely in a jar in the cupboard.

Like I said: not as bourbon-ish as I'd envisioned, but perfectly tasty popcorn. And I did get an occasional kernel that had a strong bourbon flavor.

Hmm, a work in progress ...

Friday, April 27, 2012

¡Quemadillas!

My good friend Greg, who is now proprietor of Cafe Tal in Guanajuato, and bee-tee-dubs makes the very best coffee on the whole planet, used to make an oh-so-clever pun when his quesadillas got a little burned: see, quemar means "to burn" in Spanish, so quemadillas are quesadillas, preferably in flour tortillas, which got a little burned on the outside. This makes them extra tasty, imo.

I recently decided to try Food for Life gluten-free brown rice flour tortillas, because I found them for a pretty reasonable price at my local Dave's. [Note: I am so not important enough to be getting any "promotional considerations" from any vendors. If I mention liking a product, it's because I actually like it.] I'm also a big fan of the gluten-free, vegan, soy chorizo from Trader Joe's, which tastes exactly like the stuff I used to buy in Mexico. I feel like I maybe mentioned this in an earlier post. Oh yep, there it is.

So, I was in the mood for quesadillas this afternoon, and this is what I knocked together:


For the guacamole, I mashed up 1/2 ripe avocado, added a few ounces of Stonewall Kitchen Salsa Verde Hot Sauce, a pinch of salt, juice of 1/8 lime, and some chopped fresh cilantro leaves, then mixed well.

Fillings:

1 small poblano pepper, roasted within an inch of its life over the flame of a gas stove. Just turn on the flame, place the washed pepper on the eye, and turn periodically until it's really well blackened all over. Then, wrap the hot pepper in a clean dish towel and let it cool. When it's cool enough to handle (or almost down to room temperature), it should be relatively doable to peel off the skin. Then, slit open the pepper, remove the seeds, and cut it into strips. I used about half of the strips in one quesadilla.

About 1 oz. soy chorizo, browned over medium heat in a cast-iron skillet until hot.

About 1 oz. cheese ("quesadilla" if you can find it, but mozzarella, oddly enough, works pretty well), grated coarsely.

Then, just heat up a tortilla until it's flexible, add all toppings carefully, making sure the cheese is well mixed in so that everything sticks closed. Fold the tortilla over and press down well, turning the whole thing over at least a couple of times until thoroughly hot.

Move to a cutting board, then cut into wedges. Serve with guacamole. ¡Qué rico!

Sunday, April 22, 2012

Time to make the donuts ...

No, seriously, I made donuts!

Lent is over, Alleluia!, and I've been trying to find a sane balance between eating the kinds of healthy things that made me feel good during Lent and eating the kinds of sugary things I often enjoy. My solution has been to save at least four days a week as days when I don't eat any sugar at all, but allow myself a few days when I have some sweets. I'm finding that I don't crave sweets as much, and if I start to, I may have to cut sugar back to fewer days. It's probably just my personality, but I need some sort of absolute prohibition (even if it's only a day or two at a time) to keep myself from taking a flying leap off the wagon.

Meanwhile, I found some interesting recipes during Lent, and have been looking for opportunities to try them. One of those was Gluten-Free Maple Glazed Banana Donuts from Udi's Gluten Free Foods. I even bought myself a donut pan and everything! I used rice milk instead of almond milk, because it's what I had, but otherwise I tried to stay true to the recipe for this first attempt.

It went pretty well. I think the recipe is actually supposed to make 9-12 donuts (I couldn't find that info anywhere in the recipe, please tell me if you see it!), and I slightly over-filled the donut trenches before figuring that out. (I had some leftover batter, even so, and baked that in the bottoms of four cupcake cups.) The size of the finished product is totally reasonable, but I ended up baking them 14 minutes and I think they really needed longer.

Right after coming out of the oven
Also, I tried to get cute and dip the less-pretty side in the glaze, in hopes that the glaze would cover that and make the whole thing look pretty, but the glaze only soaked in. Possible that I should have waited longer before glazing, or that I should have just dipped the less-porous top side. [I should include a shout-out here to the Carlisle (MA) Tap-and-Sap Society. I bought a pint from their 2009 run at last year's Old Home Day, and have been rationing it carefully until I can get some more. But, I thought my first donut attempt was a worthy enough cause to use a few Tbs.]

Still, they do look like donuts!
The texture is basically like a soft sponge cake, light but too delicate to dunk into coffee or anything like that. They would probably be a little more solid with a few more minutes in the oven. They're also all kinds of sweet, which was barely mitigated by the cup of strong, black coffee I had alongside, but the banana and maple flavors were very tasty.

All in all, I would try this recipe again. I think I would either look for a way to make the glaze with less sugar or try to work the maple flavor into the donuts and skip the glaze altogether. One obvious idea would be to replace some or all of the sugar with maple syrup, and add some flour to balance; the liquid:ratio balance could also be maintained, potentially, by omitting the milk. (It was a coincidence that I had rice milk on-hand, incidentally. In the future I'm sure dairy milk would work fine for those, like myself, with no dairy issues.)

Final verdict: These were easy to make and the price of ingredients, which are things an average gluten free baker would have around, anyway, was way lower than a box of Kinnikinnick or Glutino donuts in my local supermarkets. Definitely worthwhile!

And now, I definitely have to get back out and run today ...

Saturday, March 24, 2012

Jam-Filled Thumbprint Cookies

As I continue in my Lenten discipline of eating no sugar and keeping mostly vegan, I've been getting more and more interested in playing around with old favorite recipes that normally contain lots of butter, sugar, eggs, or whatever, and making them tasty without all of those things.

My secret to success, in general, has been fruit, which can add sweetness and moisture. I also recently read that nut and coconut flours can make for very moist, rich-tasting baked goods. Since I teach at a nut-free school (but coconut is apparently ok), and had had a bag of coconut flour in the back of my fridge forever, I decided to try using some. I've also read that sorghum flour can do a good job of binding itself without added gums (xanthan, guar, etc.) and had a bag of that lying around, so I decided to go with that. And finally, I always think of jam cookies as being especially tasty with a little powdered sugar sprinkled on top at the end, but I didn't want to go that route, so I decided to use some unsweetened, shredded coconut, instead.

The dough of these ended up a little pasty and not very sweet, but I think the preserves balance it nicely. If you like a little more sweetness, try adding a Tbs or so of agave nectar.

These were very touchy to form, so I might try a little xanthan gum next time, after all.


JAM-FILLED THUMBPRINT COOKIES
Makes 3 dozen cookies

1 c coconut flour
1 1/2 c sorghum flour
1 tsp gluten-free baking powder
1 tsp egg replacer
1/2 tsp salt
2 c unsweetened applesauce
1/2 c olive oil
1 tsp vanilla
1/2 c unsweetened shredded coconut
1/3 c all-fruit preserves

Combine flours, baking powder, egg replacer, and salt in a medium bowl and whisk to combine.

In a larger bowl, combine applesauce, oil and vanilla. Stir briskly to blend, then start adding dry ingredients bit by bit, stirring vigorously to combine. The resulting dough will be very crumbly, but should hold together when a small handful is gathered up and pressed into a soft ball. (Squeezing more firmly will cause it to fall apart again, but this is ok.)

If you're a slowpoke like me, you'll want to wait until after this next step to preheat the oven. If you work a little faster, you could preheat at this point or about halfway through the shaping process. Baking temperature will be 350°F.

Spread shredded coconut onto a medium-sized plate. Take up a small amount of dough and very gently press and roll it into a ball, about 1 inch in diameter (slightly smaller than a ping pong ball). Once it's holding together, place it in the coconut and roll it around a little, then, right there in the plate, shape it into a "thumbprint" shape. This means pressing your thumb down somewhat firmly in the middle while supporting the outside edges with your fingers, pressing things together again as they start to crack. There should be enough of an indentation to hold about 1/4 to 1/2 tsp of fruit preserves.

Transfer to an ungreased baking sheet and repeat until dough is all used up, moving to a second baking sheet when necessary.

Preheat the oven now, if you didn't do it earlier.

Measure out the jelly into a cup, and mash it with the back of the spoon to soften it if necessary. (Some brands of all-fruit preserves are a little excessive in the pectin department, or contain extra starch to stabilize. It's easier to measure little spoons of the preserves if you break this down a little.) Use a spoon to place a little in the dimple of each cookie, taking care to make as little contact with the cookies as possible, as they're very fragile.

Bake 20 minutes, or until golden brown. Cool thoroughly on the sheets, set on wire racks, then remove very carefully to a plate or tin. Enjoy one or two with a cup of tea for an afternoon or mid-morning treat!

Spicy Kale Chips

I put off making kale chips for a long time, because I somehow got the idea that it would be complicated and labor-intensive. I was so wrong! These were wicked easy and took very little hands-on prep.

This recipe came about after browsing a few other, similar recipes online, then throwing in some things I like. I only used 1 tsp of chili powder, and can't even taste the spiciness, so I'm guessing a Tbs is a better place to start if you really want a little kick. Mine also came out a little chewy after 20 minutes of baking, so I recommend trying 25 minutes and seeing how it goes. (I'll also come back and adjust this recipe, next time I make these.)

If you have a salad-spinner whose bowl doesn't have a drain, like mine (which is made by Oxo), you can do almost all the prep right in the bowl.


SPICY, GARLICKY KALE CHIPS

1 bunch of kale, stiff spines cut away and leaves roughly chopped or torn into pieces
2 large cloves of garlic, peeled and minced or pressed
1 Tbs chili powder
1/4 tsp salt (or more, to taste)
1 Tbs olive oil

Preheat oven to 375°F.

Place the kale into the bowl of the salad spinner and fill with cold water, then dump into the strainer and spin until thoroughly dry. Lift out strainer and set aside.

Rinse and thoroughly dry the bowl of the spinner. Mix the garlic, chili powder, salt and oil in the bowl until well-blended, then toss in a few leaves of the kale to start getting the oil mixture distributed. Dump in the rest of the kale and toss well until all leaves are coated.

Spread on a baking sheet with edges (or a jelly-roll pan) and bake for 25 minutes in the lower third of the oven, stirring well with a wooden or bamboo spatula a couple of times during baking.

Cool thoroughly, and enjoy!

Sunday, March 18, 2012

Pistachio-Stuffed Figs

When you give up sugar for Lent (or for a cleanse, for health in general, whatever), dried fruits start to taste reeeealllyyyy good.

PISTACHIO-STUFFED FIGS
(or Almond-Stuffed Dates, etc.)

3 large, dried figs (such as Smyrna)
15 g shelled pistachios

Use a small, sharp knife to remove the stem of each fig. Carefully stuff 1/3 of the pistachios into the stem-hole of each fig, then pinch closed.

A variation is almond-stuffed dates:

2 dried dated (such as medjool)
4-6 whole raw almonds

Use a small, sharp knife to make a slit in each date and remove the pit. Slip 2-3 almonds into each date and carefully pinch closed.

Serve with hot tea, if desired.

Thursday, March 15, 2012

Spinach Salad Rice Paper Rolls

Awhile ago, I wrote one post about "Pantry Creativity," and then promptly stopped updating this blog, yet again. But I still have "more rice-paper wrappers than I believe are currently available in the entire country of Vietnam," and I'm still trying to find ways to use them.

I also had a whole container of baby spinach leaves, some peanut butter and raisins (no, I swear, it was really good!) and not a lot of energy for making full-on nime chow, so I improvised.


SPINACH SALAD RICE PAPER ROLLS

32 g natural peanut butter
2 Tbs rice vinegar
1 Tbs wheat-free tamari
40 g unsulphured raisins
85 g baby spinach leaves
about 8 quarter-round rice papers

Combine peanut butter, rice vinegar, and tamari, and stir vigorously until well-blended. Stir in raisins, then toss in spinach until thoroughly coated.

Have one dinner plate and two salad plates ready: the dinner plate is for soaking the rice papers in boiling water briefly; one salad plate is for rolling the wraps, and the other is for serving.

Boil water in a kettle. Place one rice paper sheet on the dinner plate and cover with boiling water. Let soak about 1 minute, until soft enough to roll but still reasonably sturdy. Remove sheet to the rolling plate and put another rice paper sheet into the water, poking it down until covered (add a little more boiling water as necessary). Meanwhile, put a small handful of spinach filling onto the softened wrapper and roll, compressing the spinach into as small a space as possible and gently tugging on the wrapper to make a tight roll. (It's ok if they still come out sort of loose.) Leave extra paper around the edge so that paper will contact paper in the outside layer; as they cool, they'll start to stick together and make a reasonably cohesive roll. Repeat until all filling is used.

Apple Juice-Sweetened Pumpkin Nut Muffins


Yet more variations on the theme of (a) Pantry Creativity and (b) my Lenten fast. I had about 1/2 c. canned pumpkin leftover from a holiday-season recipe, which I had carefully frozen for future use. Knowing that applesauce can make a good egg substitute in baked goods, I thought pumpkin mash might work, too. Working with a pumpkin pie recipe for spice ideas, I came up with this recipe.

Note: These are not particularly sweet, at all. I think they taste great with a cup of rooibos tea with milk and a banana or a little greek yogurt on the side, but if you want something sweeter, try adding a tsp or two of agave nectar. Also, they're not terribly strong in pumpkin flavor, just nice and moist. If you really want a pumpkin taste, try doubling the pumpkin and reducing the apple juice.

My secret weapon in all muffin-baking is my silicone muffin cups. I just line them up on an old cookie sheet, fill and bake. Gluten-free muffins pop right out of them, which is great because those little paper cups tend to stick to frozen baked goods, and I always end up freezing muffins for future consumption.

Thanks are due to Rebecca Reilly's Gluten-Free Baking for the framework of this recipe, especially the flour ratios.

Apologies for the blurriness of this photo. It was morning, after all...


APPLE JUICE-SWEETENED PUMPKIN NUT MUFFINS

1 c brown rice flour
1/2 c stone-ground cornmeal
1/2 c tapioca starch
2 tsp gluten-free baking powder (such as Argo)
1 tsp egg replacer
1/2 tsp xanthan gum
1/2 tsp baking soda
1/2 tsp cinnamon
1/4 tsp ginger
1/4 tsp nutmeg
dash allspice
pinch salt
1/2 c canned pumpkin
1/4 c canola oil
1/4 c ground flaxseed
1 tsp apple cider vinegar
1 1/4 c apple juice
1/2 c apple-sweetened dried cranberries
1/2 c pecan pieces

Preheat the oven to 375°F and prepare 12 regular-size muffin cups (grease, paper, or use silicone as mentioned above).

Combine dry ingredients (top half of list, through salt) in a medium-sized bowl and whisk gently to blend.

In a small bowl, combine pumpkin, oil, flaxseed, vinegar, and a little of the apple juice. Stir well with whisk. Whisk in some more apple juice until a thick, liquify consistency is reached. Make a well in the dry ingredients and add pumpkin mixture, stirring from the center to incorporate dry ingredients. Once most of the dry ingredients are incorporated, add more apple juice if needed to make a thick but almost-pourable batter. Stir in cranberries and pecans.

Spoon into muffin cups and bake 18 minutes. Cool on a wire rack, turned out of muffin cups if possible.

Sunday, March 4, 2012

"Sweet" Rice Flour Crêpes


"Sweet" rice flour is a flour made from glutinous or "sticky" rice. It's available at many Asian grocery stores. I found a 5-lb bag of it in a Korean grocery store in Ayer, MA, quite a few years ago and have been chipping away at it ever since. It keeps just fine when closed well and kept in the fridge (most gluten-free flours do better stored in the fridge rather than at room temperature), but somehow there's a little voice inside my head that keeps saying, "use that stuff up!" so I'm always trying to think of new ways to do it.

It's Lent again, so I gave up all kinds of things again for my Lenten fast (a nearly-vegan diet focusing on whole grains, legumes, vegetables, dried fruits and occasional nuts, plus skim milk and homemade skim-milk plain yogurt; no sugars, honey, maple syrup, etc., no caffeine, no alcohol, small portions, no snacking). On Sundays, there is a rule that says you're supposed to indulge in small amounts of what you gave up, to remember that Sunday is always a special day, even in Lent. Me, I like to go for some butter, cheese and eggs. Two of those are represented in this recipe.

UPDATE: I've increased the amount of milk from 1 c. to 1 1/2 c., because I seem to use at least twice what I originally indicated. Start with 1 1/2 c., but be ready to add significantly more. The sweet rice flour just seems to absorb a lot of liquid.

This recipe is heavily based on the basic crêpe recipe from Mark Bittman's How to Cook Everything Vegetarian, which I highly recommend. I made half this quantity (which, in turn, is half of Bittman's recipe), but it involved using half an egg, which is more trouble than most people would consider worthwhile. I knew I was going to use a great, chunky farmstand applesauce for the filling, so I added the cinnamon, nutmeg, vanilla and agave nectar. I recommend adding some kind of flavoring (garlic would be a tasty addition for a savory crêpe), because sweet rice flour is actually a little bland-tasting on its own, despite the name.

If you've never made crêpes before, be ready for a learning curve. (I, for example, just learned while typing this post that the first e in "crêpes" has a circumflex, not a grave accent, on it. After all these years of thinking I was clever. Oops.) But seriously, the first couple may just look horrible, and that's really okay. Make sure your griddle is flat, preferably with low sides, that your batter is very thin, that the heat is at a nice medium level, and that you use butter generously, and eventually you'll probably get the hang of it. At least, I pretty much have, and I'm no great shakes at this kind of thing.

UPDATE: I made these again and took a photo this time!


SWEET RICE FLOUR CREPES (GF, nut-free, vegan)
Serves 2

1/2 c. sweet rice flour
1/2 tsp. cinnamon
1/8 tsp. nutmeg
1/4 tsp. xanthan gum
a pinch of salt
1 egg
1 tsp. agave nectar (adjust to taste)
1/2 tsp. vanilla
1 Tbs. butter, melted and cooled
1 1/2 c. milk, more or less as needed

Whisk the dry ingredients together in a bowl. Beat the egg lightly, then whisk in agave nectar, vanilla, butter and half the milk, and whisk liquids into dry ingredients, mixing until very well blended. Add more milk as necessary to achieve a very pourable batter. If there is time, refrigerate batter for a couple of hours before cooking.

Turn on oven to warm setting and place an oven-safe plate on the middle rack.

Place a griddle over medium heat. When hot, coat well with butter. (I just pick up the whole stick and quickly rub one end all over the hot griddle.) If you overdo this, you'll notice the batter sliding around a little as you add it, so this is one of the many variables to adjust until you find what works best for you.

Check consistency of batter and add milk if needed. I ended up adding quite a lot, maybe even half again what I mention above.

When adding batter to the griddle, the trick will be to tip the pan around quickly so that the batter coats it in as thin a coating as possible. For the first, test crêpe, ladle a small amount of batter, maybe 2 Tbs. worth, into the pan with one hand while tipping the pan around with the other. Cook until the top side looks dry, then flip with a wide pancake turner. Cook until golden brown, then flip back if necessary to brown the first side. Avoid letting the crêpe become crispy. When done, transfer to the plate in the oven or, if it's really too ugly to serve (which it really might be), have yourself a snack, give the dog a treat, or just throw it away.

Add a little more butter to the griddle and now, if you're feeling brave, try a full ladle (about 1/4 c.) of batter, to create a full-sized crêpe. Continue as above (hopefully without feeding the dog again), then start the next crêpe in the same manner. Stack the finished crêpes neatly on the warm plate until all are ready to fill and serve.

To serve, fill with sweet or savory fillings of your choice, roll and sprinkle the top with sliced, toasted almonds, powdered sugar, fresh herbs, or drizzle with syrup or sauce.

Saturday, August 6, 2011

Let's call it "crombler"


Is it a cobbler? A crumble? I'm not sure, because I pretty much improvised as I went along. But, when I was a houseguest of friends in Ohio and they had a glut of fresh peaches needing to be enjoyed, I was happy to take on the challenge of making some yummy, gluten-free desserty thing.


I had a successful second run at the recipe this weekend at my parents' house, with the variation that we substituted some of the peaches with my dad's favorite, blackberries. Both versions were pretty awesome, especially when served warm with a little vanilla or butter pecan ice cream.

PEACH or PEACH-BLACKBERRY "CROMBLER"

2 lbs. peaches (about 4-5) OR 1+ lbs peaches (2-3) plus 1 pt blackberries
1/4 c. maple syrup
1 tsp vanilla
1 c. almond meal, divided
2 T butter or butter substitute, plus additional for greasing
1/4 c. sweet rice flour
1/2 c. firmly packed dark brown sugar
1 tsp cinnamon
1/2 tsp ground ginger
1/2 tsp salt
Optional: pecans, walnuts or almonds, chopped into small pieces


Preheat oven to 350°F. Grease an 8"x10" glass baking dish and set aside.

Peel and slice peaches into a mixing bowl. Add blackberries, if using. Stir in maple syrup, vanilla and 1/2 c. almond meal. Pour mixture into baking dish and spread into an even, shallow layer. If using nuts, sprinkle a thin layer over the fruit. (I didn't measure these, but I'm guessing about 1/4 to 1/2 c.?)

In a small bowl, combine the other 1/2 c. almond meal and the sweet rice flour. Add butter (or substitute) and pinch it in with your fingertips to form a coarse meal. Add brown sugar, ginger, cinnamon and salt and mix well, using the same pinching motion. Sprinkle evenly over the fruit layer.

Bake 40 minutes, or until thoroughly bubbly. Let cool at least 15 minutes before serving. A scoop of ice cream is a very nice addition.


Friday, July 15, 2011

Pantry Creativity

Necessity is the mother of invention, right? Earlier this month, I received my vehicle excise tax bill, and even the quarterly payment was a whopper. Ouch. And you know how gas prices are skyrocketing? Suffice to say, I'm on a seriously constricted budget for my grocery expenditures for at least a little while. I still have milk delivery each week, and I'll shop for a few, inexpensive vegetables and fruits (bag of carrots, frozen broccoli or spinach) to keep real nutrients in my diet. But basically, this means being reeealllyyy creative with what's in the pantry (and fridge/freezer).

I did have one strike of luck, in that a good friend of mine who is also vegetarian and gluten-intolerant recently moved across the country and had some pantry items she didn't want to ship. I "inherited" some GF pasta, a large jar of nopalitos, and more rice-paper wrappers than I believe are currently available in the entire country of Vietnam. All of these have played roles in my recent inventions.

I'll tweet more successful results (and probably the not-so-successful ones, too) under the #pantrycreativity hashtag until I get around to writing another post here.

Invention #1: Mac&PB&J

What can I say? I was feeling lazy and was out of bread.

56 g dry Tinkyada gf macaroni elbows
28 g peanut butter
14 g jelly (I used blueberry)

Boil macaroni in salted water as usual. While it's cooking, mix peanut butter and jelly in a bowl until well mixed. When pasta is ready, drain well (rinse if desired), then stir into PB&J mixture.

It's better than it probably sounds to some of you, not quite as good as it may sound to others.

Invention #2: Spring Rolls

Like I said: "more rice-paper wrappers than I believe are currently available in the entire country of Vietnam." I didn't have any of the usual fillings, like cellophane noodles, fresh spinach or lettuce, tofu or basil leaves, so I had to simplify.

6 "triangle" (1/4-round) shape rice paper wrappers
1 small carrot
28 g peanut butter
a splash each of rice vinegar and wheat-free tamari
85 g frozen broccoli florets, thawed and chopped smaller

Combine peanut butter, rice vinegar and tamari in a bowl. Grate carrot with the fine side of a box grater, then mix into PB mixture. Add broccoli and mix.

Have ready a shallow, heatproof dish (like a pyrex brownie pan), a large dinner plate and the smaller plate on which you plan to serve the spring rolls. Place one wrapper in the heatproof dish. Boil water in a kettle, then pour just enough over the wrapper to cover it. Gently poke it around in the water to make sure it stays covered and softens; this will take just a few seconds. Remove from water with bamboo tongs or your fingers if the water has cooled fast enough.

Carefully spread wrapper on the large dinner plate and immediately place the next wrapper into the still-warm water and poke it until submerged. Add about 2-3 Tbs of filling to the wrapper on the plate, and carefully wrap it by folding over one side, then the right-angle corner, then the round edge, and rolling toward the loose side as tightly as you think it can handle. Rest the roll at the edge of the plate to drain a little before transferring it to the serving plate. Meanwhile, the next wrapper should be ready. Repeat until all wrappers and filling are used, adding boiling water to the heatproof dish as needed.

These, I liked. I've repeated this a few times. I thought I had a photo, but unfortunately I can't find it.

Invention #3: Nopalitos Corn Bread

That was one ginormous jar of nopalitos my friend gave me. After a few days of nopalitos tacos and huevos con nopalitos, I just wanted to get rid of the things. This inspiration turned out to be very successful.

1 recipe "Southern Corn Bread" from The Joy of Cooking (p. 777 in the hardcover edition of the 1998 revision)
1 c. drained nopalitos, including the jalapeño from the jar, minced

Prepare according to the recipe omitting the sugar and cutting back the salt to 3/4 tsp (1/2 tsp might have been better), stirring in the nopalitos and jalapeño just before transferring batter to a preheated, 10-inch cast iron skillet. By the way, I substitute buttermilk powder and water for the buttermilk in the recipe, and only used half the water indicated (1 c. instead of 2, I think it was).

I ate it with some huevos con chorizo de soya (that's Trader Joe's soy chorizo, which is gf and vegetarian), to which I had added some Narragansett Creamery queso blanco, and a Redbridge. (Yes, it was a "treat" day.*) Yum!

Invention #4: Veggie+ Mac&Cheese

Normally, I like my mac&cheese unadorned, but I am trying to eat healthier, so here's what I did:

1 box gf mac&cheese (Annie's, Trader Joe's, Pastariso, whatever)
1/4 c nonfat milk
1 Tbs butter
1 carrot, grated fine
85 g frozen broccoli florets, thawed and chopped smaller

Boil macaroni in salted water. Combine sauce mix and milk in a measuring cup and stir well until smooth. When macaroni is ready, drain, rinse well, and leave in colander. Rinse pot and return it to stove over medium-low heat. Melt butter and add carrot, then cook while stirring regularly until a little soft. Add broccoli and cheese sauce, stir to combine. Add cooked macaroni and stir well over medium heat until sauce thickens a little, which takes at least a few minutes.

This made three generous portions, two of which I froze for later consumption. They reheated nicely in the microwave.

Invention #5: Carrot-Yogurt Salad

I make my own yogurt using a Deni yogurt incubator, so I usually have some on-hand.

6 oz. plain, nonfat yogurt
dill, paprika, garlic powder, salt and pepper to taste
28 g pistachios, chopped
1 carrot, shredded fine
2 Tbs ground flaxseed

Mix yogurt together with seasonings until well blended. Add pistachios and flaxseed and mix well. Mix in carrot. Ta-da! Very satisfyingly crunchy.

Invention #6: Pasta Salad

A friend of mine is having a potluck party this weekend, and is providing ice cream so she prefers that people not bring dessert. I have a lot of gf baking supplies on hand, but not much for baking savory things. She did say it was ok to show up empty-handed, but I felt embarrassed to do so.

Fortunately, I had an idea.


1 small onion, chopped (or 1/2 onion; I think I had a little too much)
1/2 c. plain, nonfat yogurt
1 tsp dill
1/2 tsp garlic powder
1-2 Tbs olive oil
1-2 Tbs apple cider vinegar
1 medium carrot
7-8 oz. dry GF pasta
leaves from 3 sprigs of fresh mint
salt and pepper to taste


Chop the onion, separate the pieces well and soak in a baking soda solution (1 Tbs : 1 c water) for 15 minutes, then drain and rinse well.

Combine yogurt, dill, garlic powder, olive oil, and vinegar in a small bowl. Add onion after soaking/draining/rinsing. Cover and refrigerate overnight (optional).

Boil water in a large pot. When it reaches a rolling boil, stir in pasta and a generous shake of salt. Stir regularly, especially in the first couple of minutes of cooking.

Meanwhile, grate the carrot into a large bowl, using the coarsest side of a box grater. Add yogurt mixture and mix well.

When the pasta is done, drain and rinse briefly, shake out extra water, then add to bowl while still warm. Stir well to combine ingredients thoroughly. Add salt and pepper to taste.

Snip mint leaves into small pieces over bowl, then stir to combine completely. Transfer salad to an airtight container and refrigerate until ready to serve (preferably in the next day or so).


* After successfully reaching the "normal" BMI range, I fell into summer slothfulness (and travel-eating) and gained back some of the weight I'd lost. I decided that it's not worth berating myself over every cookie, but there had to be a way to balance rich snacks with healthy eating habits. My solution? First of all, treats are one small desserty-snack and one richer meal per day; second, I only get to have those days if my weight is down when I do the Wii Fit "body test" in the morning. If it's not down, then it's healthy-eating-only that day. So far, it's working fine (and I've re-lost about half the weight I'd re-gained).

A couple of days ago, a new friend was surprised to hear that I'd had a donut for breakfast that morning. Specifically, she asked, "How do you look like that, if you eat donuts?" I explained my treat-day system. But also thanked her: no one had ever before implied that I looked like someone who didn't eat donuts. I guess anything's possible. :-)

Sunday, April 3, 2011

How possibilities can change ...


It has been over a year since I've updated this blog, but I think about it regularly. It's hard to find time to post, yes, and even harder to find adequate time to take good photos of the things I cook (even when there is time to cook). But, I invented a recipe this morning that I'd like to share, and I have some thoughts, in any case.

When I began this blog, nearly four years ago, it was my assumption that my body type was pretty much set for life, whatever changes I might make in my habits. But last summer, I decided I wasn't happy enough with my habits and needed to make more lasting changes.

I was exercising too little, eating too much, too frequently, too unhealthily. I had lost the habit of going a few days between servings of sweets, and of cooking up good food that I could grab for a meal when I was in a hurry. I needed better motivation. So, I decided to try Wii Fit.

It was a significant initial investment, so I saved my money by quitting my YMCA membership and using my second-hand exercise bike for exercise for a few months until I had enough money for the Wii and the Wii Fit. I quickly discovered that I don't like the Wii Fit's reliance on the BMI as the only measure of the user's health, and the fat-shaming it gives you if you're outside the "normal" range. And was I outside the "normal" range? Oh yeah, I was "obese." Which is just a lovely thing to be told every morning.

But, I did like the activities themselves, and found it cathartic to yell at the Wii when it called me "obese" or "unbalanced." After all, it is a gaming system, so I made it a game. I decided to stick with it, did different combinations of exercises every day that added up to 30 minutes, and built up my will power to skip desserts and bring my portion sizes back down.

And, lo and behold, and really at least somewhat to my surprise, I actually did start to lose weight. And kept losing it. And losing it. I went from a BMI of something like 32.25 to my current 24.75. That's nearly 40 lbs, on my 5'2" frame, and puts me within the "normal" range for the first time in over half my life. More importantly, I have more energy than ever, and I can actually run. I'm planning to participate in a 5K race in June.

Today is the fourth Sunday in Lent, and I have started observing Lent much more, well, observantly in the past few years. I've decided that my health is a gift, and I should show my thanks by adhering strictly to my healthiest habits during Lent: 30 min aerobic exercise every day; meals made up of small portions of healthy foods like plain, nonfat yogurt, whole grains, vegetables, beans, and the occasional natural peanut butter and unsweetened jelly; no coffee or tea (except herbal); no alcohol; no sweets at all; no snacks. I also give up shopping for anything I could live without until Easter, so I end up doing a lot of creative cooking and rummaging through my pantry and freezer. I've eaten a LOT of various kinds of beans with brown rice.

And today, I made up a muffin recipe, thanks to the mashed roasted peaches I found in the freezer. (Note: I totally don't remember how I roasted the peaches and am too lazy this evening to find that recipe. If you don't want to try faking it, you can probably get the same effect by buying a can of peaches packed in juice without sugar and mashing them up with a potato masher.) This recipe is actually vegan! And decently tasty, although the muffins break pretty easily. But they contain no fat other than flaxseeds, are sweetened with brown rice syrup (Lundberg Farms is GF), and probably have at least a little protein in them.

I used Annalise Roberts's Gluten-Free Baking Classics as a guide for some of the quantities.

PEACH GINGER MUFFINS (GF/Vegan)


Dry ingredients:
3/4 c. ground flaxseed meal
1 c. millet flour
1 c. garfava flour
3/4 tsp. xanthan gum
1 Tbs. baking powder
1/2 tsp. baking soda
1/4 tsp. salt
1/2 tsp. ground ginger

Wet ingredients:
5/6 c. brown rice syrup
3/4 c. mashed, cooked peaches, in liquid
1/2 tsp. vanilla

In a large bowl, mix all the dry ingredients, whisking to combine thoroughly.

In a smaller bowl, combine the wet ingredients and stir well. The syrup is heavy, so you will need to stir thoroughly.

[The above steps can be done the night before, if you want to be able to make fresh muffins quickly in the morning—although, I actually was able to do this whole process pretty fast. Just close each container well and store in the fridge.]

When ready to bake, preheat oven to 375°F. Grease 12 muffin cups with olive oil (I use a set of silicone baking cups arranged on a cookie sheet; if using a metal muffin tin, I'd suggest lining with paper).

Stir wet ingredients into dry ingredients until well incorporated, then spoon into muffin cups, distributing evenly. The batter will not quite fill the cups.

Bake about 22 minutes, or until firm and slightly golden on top. Turn out onto a wire rack and cool. The first one was tasty when cooled just slightly.

I've frozen the rest for future breakfasts. Hoping they reheat well!